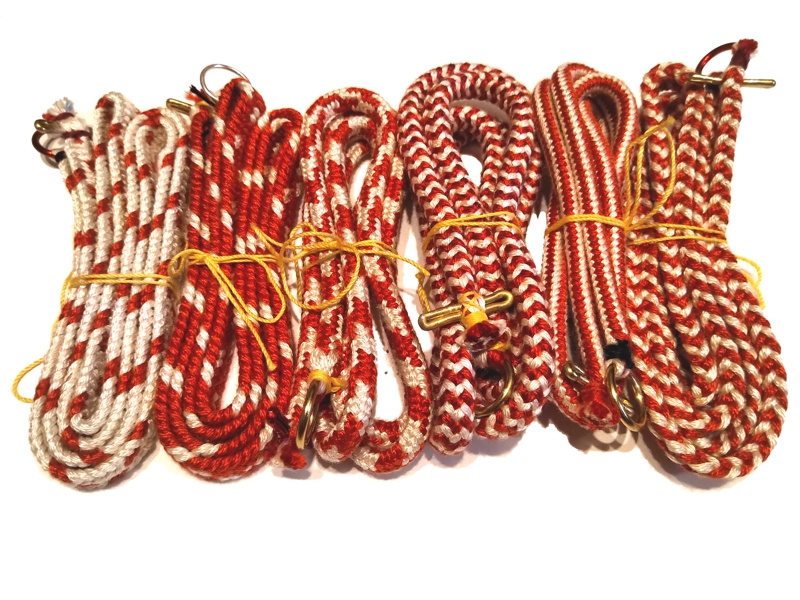
Our SCA Kingdom, the Sylvan Kingdom of Aethelmearc, had its Spring Coronation last weekend, so I made some braided medallion cords for the Baronial gift basket to the Crown.
Six silk medallion cords in red and white
I was a little short of time, having entered the six 16-tama braids I made in the fall into a largess derby in January, so I did mostly 8-tama braids. One of the braids is the 16-tama double-rai braid, four are yatsu se, and one is shige uchi. I should do a batch of the 9-tama shige uchi braid next time.
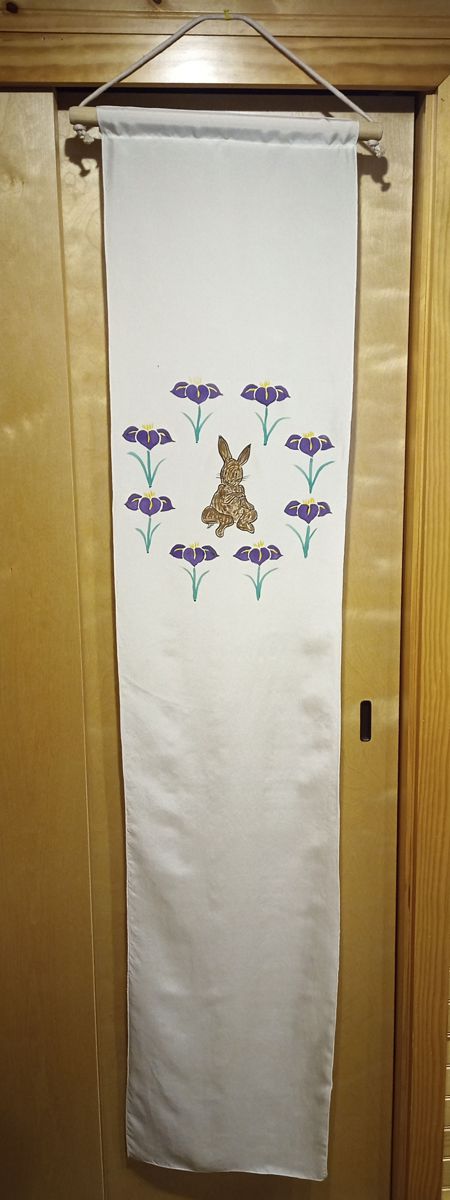
My sweetie answers her writ to the Order of the Laurel tomorrow. Here is the silk banner I made for her!
Argent, a brown rabbit sejant affronty proper within eight irises in annulo purpure slipped and leaved vert
This banner is made with “Dye-na-flow” paint on habotai silk. I pre-treated the silk with “No-Flow” sizing to make it react to ink more like paper than fabric, so I could just trace the artwork as if it was an illustrated scroll. I’ve had mixed results with this method, but I think it came out wonderful this time around. The suspensory braid is a 16-strand braid in white silk, actually a length of braid left over from Duchess Sir Morgen’s elevation garb.
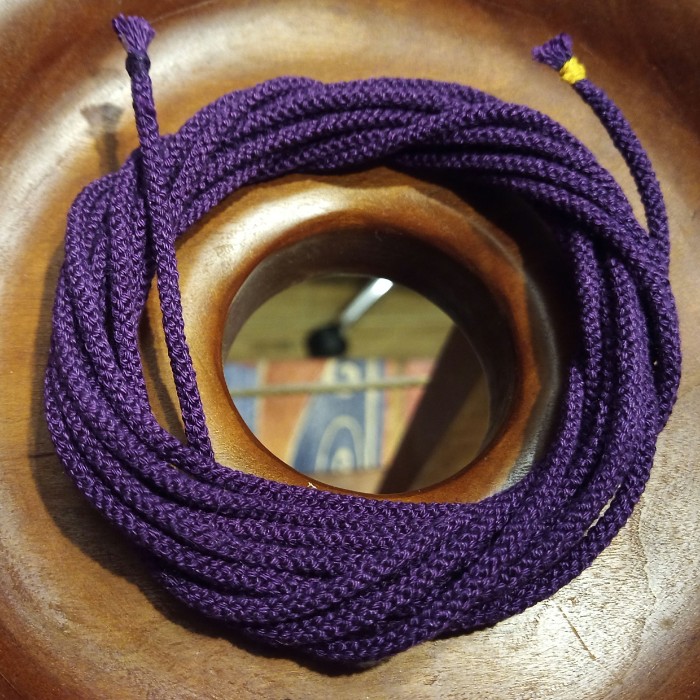
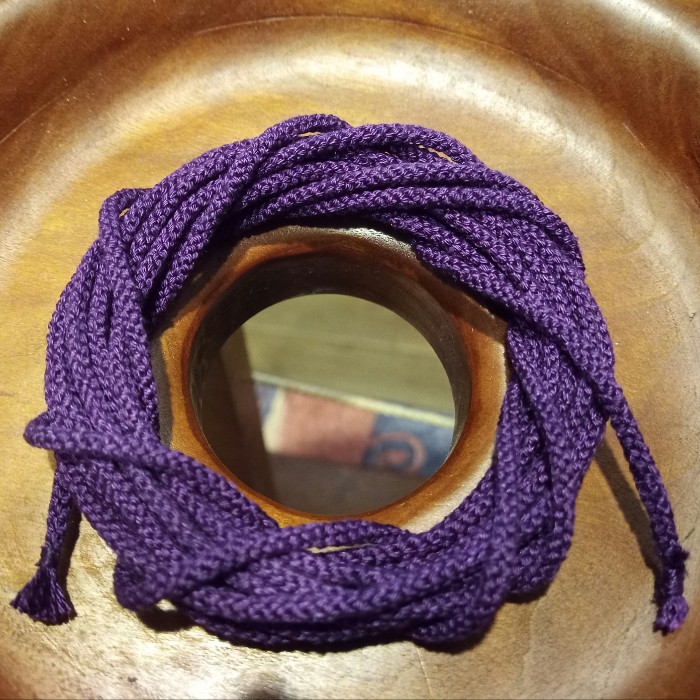
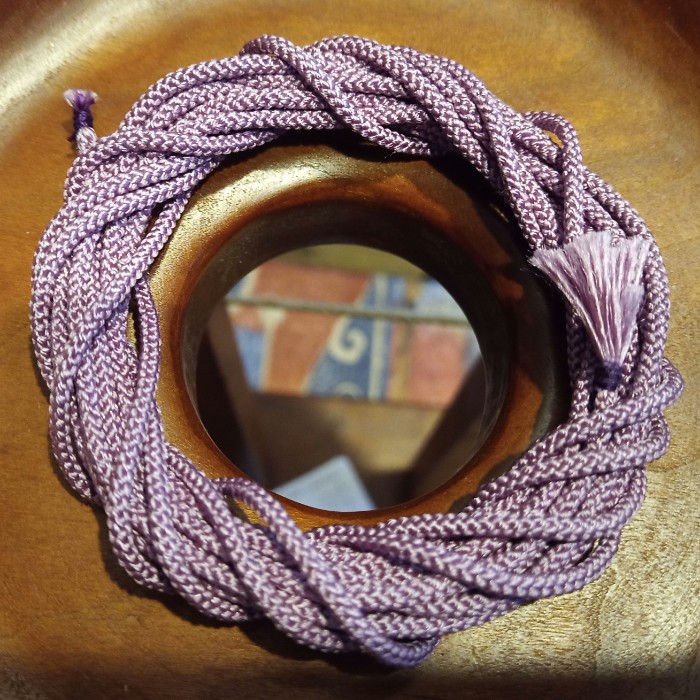
Sweetie needs some braids to make tokens for her elevation later this month, so I spent a few weeks doing nothing (braiding-wise) besides edo yatsu in silk.
Edo Yatsu in violet silk
Edo Yatsu in violet silk
Edo Yatsu in lilac silk
Edo Yatsu in lilac silk
These are all 8-strand “round” braids about an eighth of an inch in diameter. The violet braids use lace-weight silk yarn, but the lilac braids use reeled-silk. This fine filament silk is a bear to work with, especially in bulk lengths like this. Each braid is about four yards long, starting from about five yards of material.
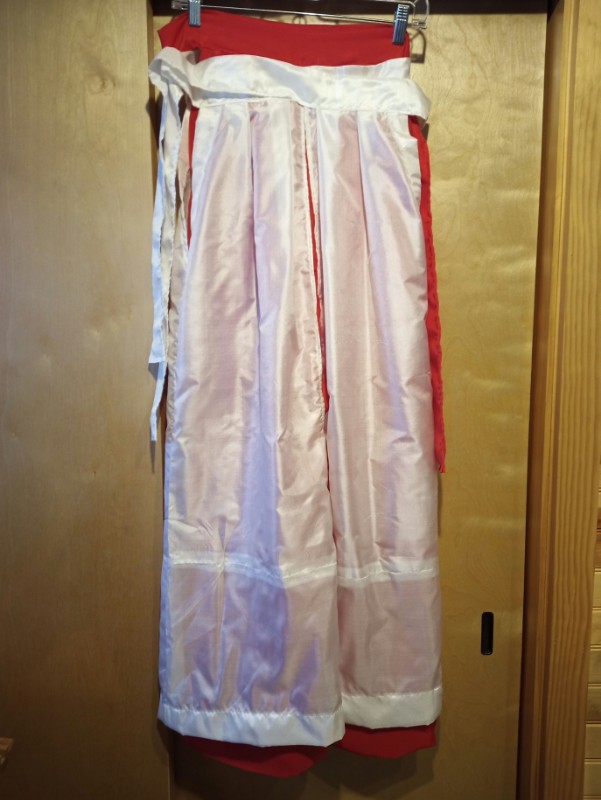
Back in 2018, when I was being elevated to the Order of the Laurel in the SCA, Sharon made some parts of a Sokutai Sugata for me to wear as my elevation garb. She made the two most important upper-body garments, the houeki no hououter robe and the shitagasanemiddle-layer robe with its long kyo tail. I made or purchased many of the accessories for the garment such as the kanmuri headgear, sekitaibelt of stones, shakubaton, and hiraobelt. However, the lower-body garments and some accessories were substituted with less-formal items because we ran out of time.
To prepare for her elevation next month, I decided to make at leat two of the missing items, which had been on my to-do list for some time. I made the uenohakama out pants, and the oguchi lining pants.
Uenohakama from white silk
Most of the time, when you see the uenohakama, they are lined and appear to be both of these garments in one. The lined uenohakama are for winter wear. These are for summer wear and are unlined. uenohkama are made very differently from regular hakama. They open in the front, and they only have one long waist tie that connects the front and back at the sides. The tie is arranged so that it can be knotted at the right hip, and there is a fly strip that covers the opening at the front.
Oguchi from red silk
The oguchi are supposed to be a bit longer so that the hems are visible sticking out from beneath the hems of the uenohakama. I wound up making mine about the same length as the uenohakama, so I sewed on an extra bit at the bottom to add weight and appear as a hem. The oguchi also only have one tie, and it is arranged to tie at the left hip.
Layered together, the two garments look like this, though you’ll have to wait until after Hara’s elevation to see what they look like as part of the outfit.
A second braid made on the takadai. This one is a 33-tama 2/2 twill braid made with four plies of reeled silk yarn per strand. 16 strands are rose pink, and 17 strands are scarlet. I started with twice the length of material as last time, and wound up with about 6 feet of braid.
Silk 2/2 Twill Takadai Braid, ~2 yards
Because I used reeled silk instead of plied silk yarn, the braid came out much smoother, flatter, and even than the first braid. The takdai does a lot of the work, of course, keeping the tension even and such, but I am really happy with this braid.
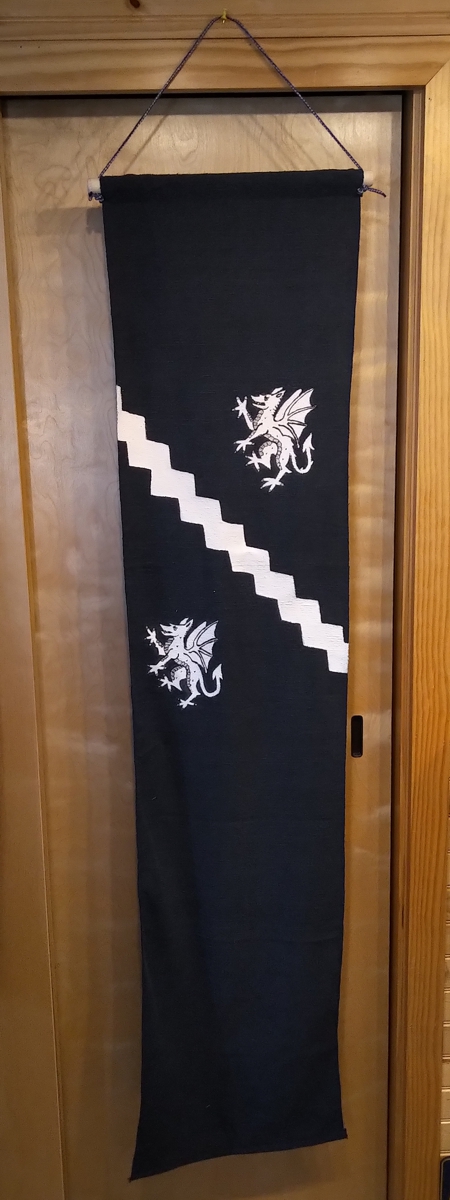
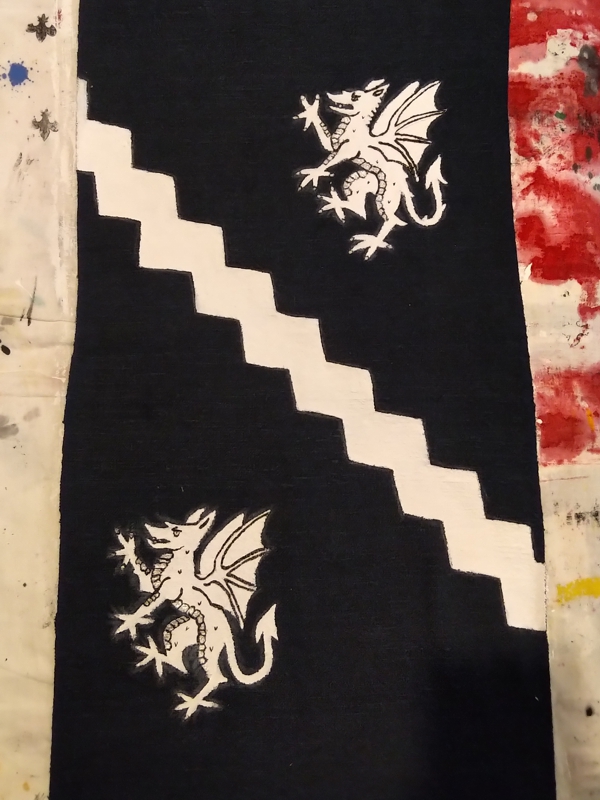
I actually completed this banner back in June and gave it to her at Pennsic in August, but I never posted about it. Maybe I didn’t want to spoil the surprise before, and then forgot to post after? Anyway, my friend Shirin al-Susiyya was being elevated to the Order of the Laurel back in May, so I decided to make a banner for her as a gift.
Azure, a bend dancetty between two dragons segreant argent
The fabric is some nice navy blue raw silk. The paints are acrylic fabric paints. It took me a little longer than I was hoping, so it wasn’t finished in time for her elevation, but she has it now. Some words on process:
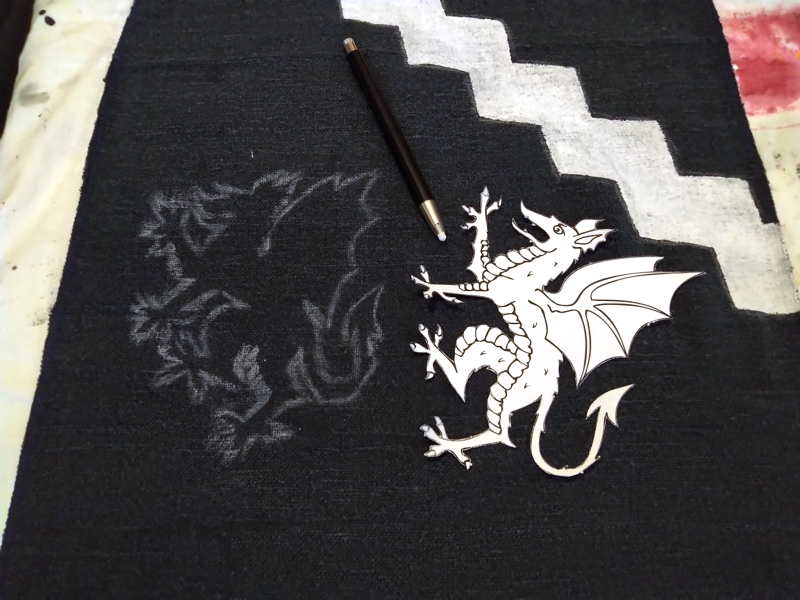
First, outline in chalk
A good way to get repeatable complex shapes (like heraldic animals) if you are bad at freehand art (like I am) is to print out a picture of the shape at the exact size you want it. Then, cut around the outside of the template, place it where you want the shape, and trace around the outside with chalk.
After painting the shape, pencil interior lines
Fill in the basic shape with a coat or two of paint, then cut the template apart so you can use the pieces to trace out the interior lines in pencil. You can probably freehand some of the smaller details, but sometimes I get pretty small with my template pieces.
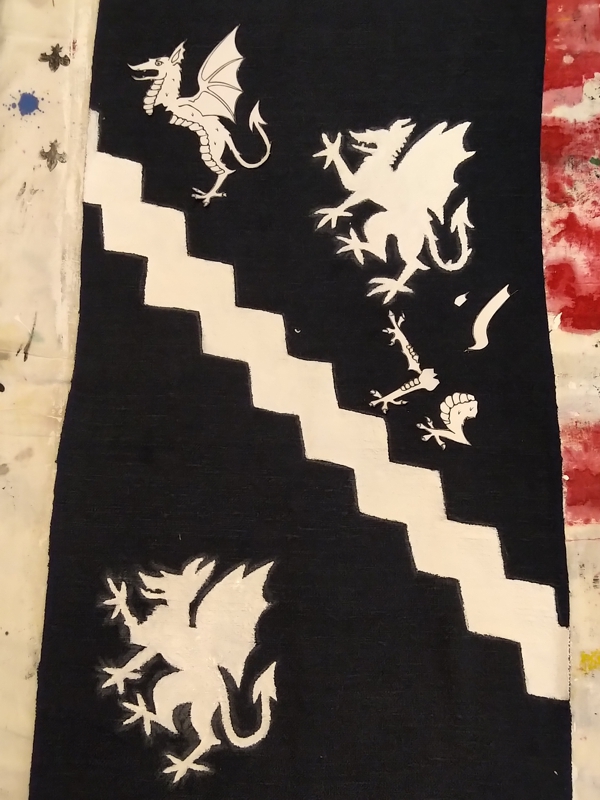
Finally, paint interior lines
Then, use a fine brush and some black paint to outline the shape and ink the interior lines.
I’ve used this method a bunch of times, and it really produces good results for me. Make sure to follow the manufacturer’s instructions for setting the paint!
I have been meaning to acquire a takadai braiding stand for years. They can be expensive, so I have been waiting until I decided that I was getting bored with marudai braiding, then I would probably make one. Braiding teacher Shirley Berlin broke the news to me several months ago that I would never really get bored of marudaikumihimo.
More recently, a friend of ours decided that she was ready to get rid of some surplus braiding equipment. She asked me if I knew anybody who was looking to buy a takadai, and quoted me a very good price.
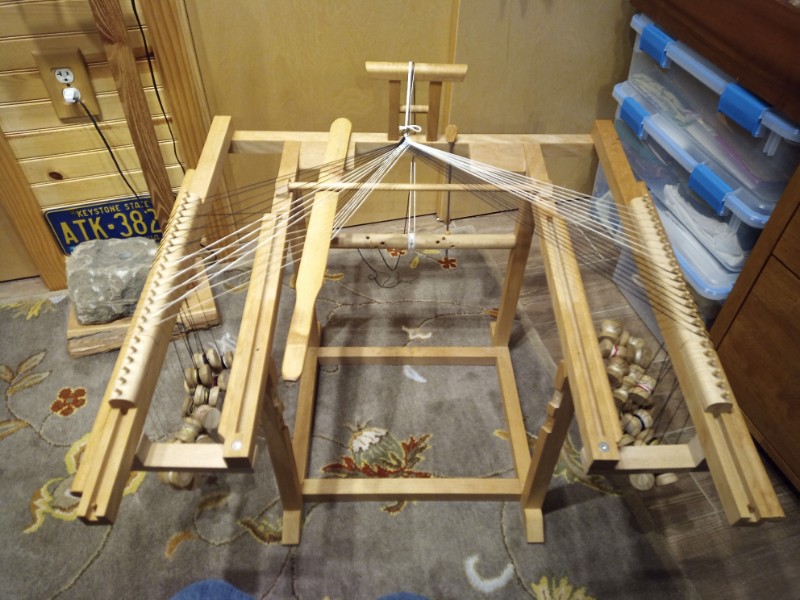
So, I decided to bite the bullet and get started. Once I got it assembled, it looked like this:
Ready for setup
The piece of bamboo resting diagonally across the lower arms is the beater sword used to tap stitshes into place. The pegs on the left and right upper arms are mounted in koma that slide along slots in the arms. At the top of the takadai is the tori. Lower down is the roller and standing vertically is the long metal pin that secures the roller.
To set up the takadai, you measure out a sufficient length of material and a sufficient number of threads of material for your braid. The definition of “sufficient” will vary based on the braid you are trying to make and the material you are using. (I measured out 34 55″ long threads of white 30/2 silk yarn and 32 55″ threads of black.) Then you tie a leader cord to the roller, pass it up over the tori, and tie it to the gathered end of your material. Then you separate out threads of material and wrap most of it around tama bobbins. (I wrapped two threads on each tama, so 17 white and 16 black.) Lastly, you hang strands over the koma, one tama per peg, on both arms of the takadai. (I started with all the white strands on the right, and all the black strands on the left.
Working a braid
To work a braid on this setup, you create a “shed” on one side of takadai by pushing some threads down. (I was making a simple weave braid, so my pattern was just alternating over (down) and under (up).) Then, you wedge the sword into the takadai so that it holds the shed open. Next, you pass the topmost strand from that side through the shed, and make it the bottommost strand on the other side. While you remove the sword and close the shed, use the sword to beat the point of braiding and tighten the braid. Repeat this process on the other side. Keep repeating this side to side and a braid will start to form.
Braid forming on the takadai
When a koma at the top of an arm is empty, move it to the bottom of that arm and slide the other koma upwards. If a tama is getting to close to the arm, unwrap it six or seven inches. If the point of braiding is no longer over the round stick that holds the sword down, crank the roller a little to wind up the leader.
Braid getting long
Eventually, the braid will get long enough to wrap around the roller itself. Keep going. By this point, I was doing one full iteration (with the material returning to start position) about every forty minutes, making about 2.5 inches of braid.
Leaders starting to show
After even more time, the tama leaders will start to peep up over the edge of the koma. Now you are in the home stretch, but you are far from the finish line. Keep going until you are almost out of material.
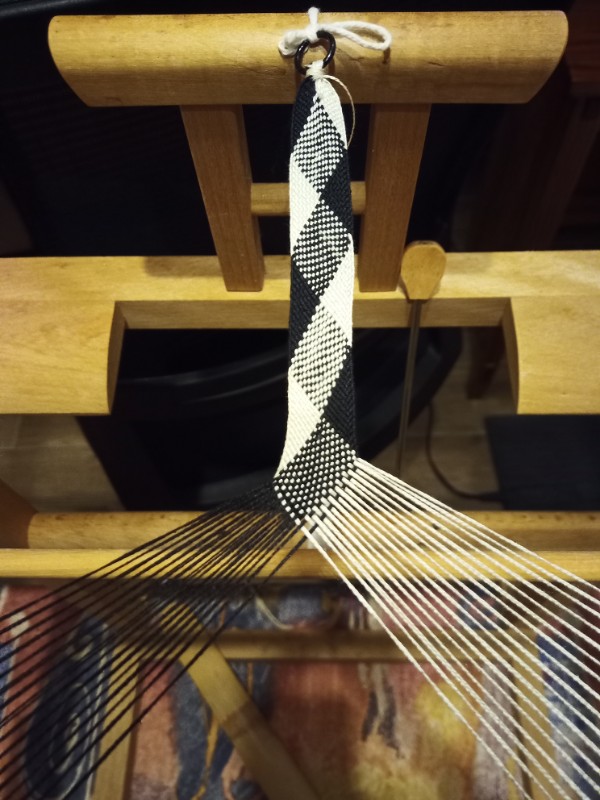
Finished takadai braid
My braid came out 25 inches long and about an inch wide. You can see how the black and white strands pass back and forth through each other and themselves. Not bad for a first braid!
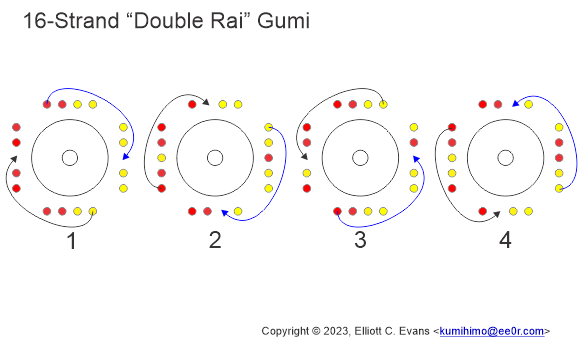
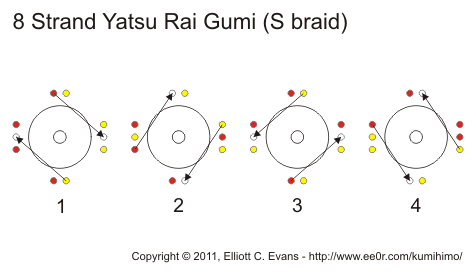
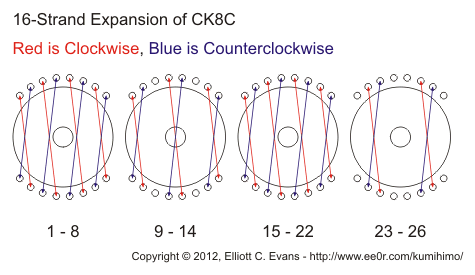
I’ve been doing a bunch of 16-strand braiding these days. All of my donated medallion cords for a few years have been 16-strand braids because I started getting a little bored of 8-strand all the time. It always bothered me that while most of the 16-strand braids in Jacqui Carey‘s Creative Kumihimo are expansions of some of the 8-strand braids in the same book, there was no doubling of the “8J” Yatsu Sen / Yatsu Rai pattern. “No problem,” thought I, “we can figure this out.” Hence:
I haven’t seen this in any books or anything, so as far as I know I made it up. It wasn’t that hard to figure out, though, so I would not be surprised if somebody else provides this pattern somewhere.
I started making these printable “index card patterns” more than ten years ago. They are a pretty good reference, but only if you already know how to braid on the marudai. This is the first new one I’ve made in a while. I think the last one I made was this “Double Maru Yotsu” card in 2012. Feel free to copy these or print them out for your personal use, just don’t use them for any commercial purpose without asking my permission.
Have fun! I’m working my first try at this braid right now, and it’s pretty challenging.
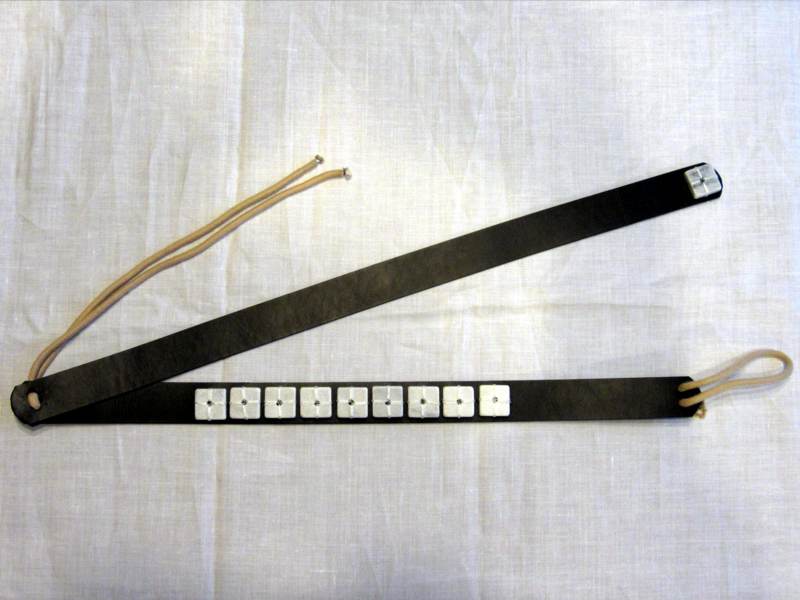
I did these braids back in the fall, but I held onto them for a while and then put them into the Baronial gift basket to the crown for Kingdom coronation. I’m posting today because Coronation was yesterday.
Coronation Braids, Spring 2022
From left to right there are two 9-strands flat braids, three 16-strand round braids, and one 8-strand flat braid. They are all silk, and all intended as medallion cords.
I don’t know if all that is exciting enough to withhold “the surprise” for six months, but there it is. Now it can be told.
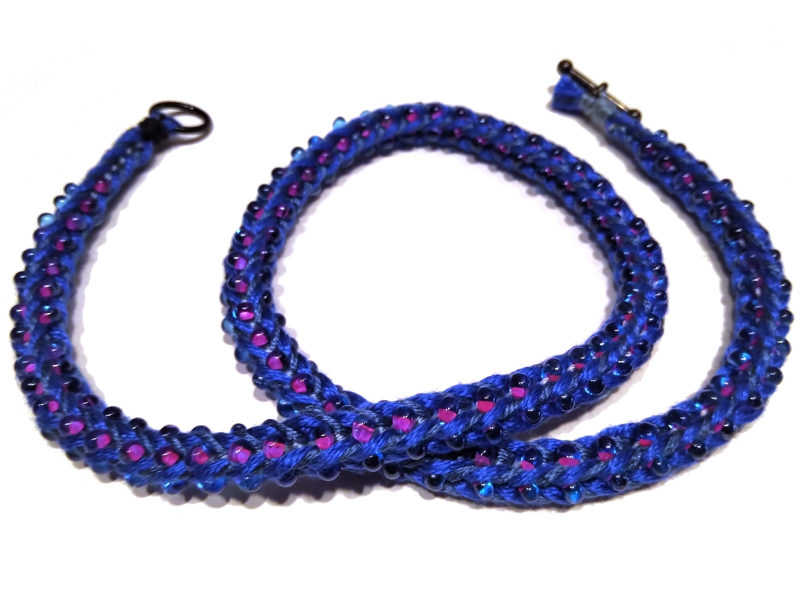
The braid I used for Fancy Square Braid and Another Fancy Braid has these nice compressed inner threads, and it struck me that you could make those inner threads beaded, and the beads would be nicely couched in the braid. I had some “magatama” beads in my stash from the swag bag of the AKS conference in 2017, so I decided to try it.
Fancy Braid with Beads completed 2021.11.08
I really like how it came out. There are a couple of “errors” in it, but I mostly recovered from them quickly so the overall braid was not disrupted. The magenta inner core on each bead makes a nice counterpoint to the different colors of blue thread I used for the other strands. The beads are strung on “S-Lon” beading cord, were kind of a challenge to get them well seated in their stitches, but I was able to work out a method eventually. The “magatama” beads have a teardrop shape, and are only on every other side stitch, which made it somewhat easier.


