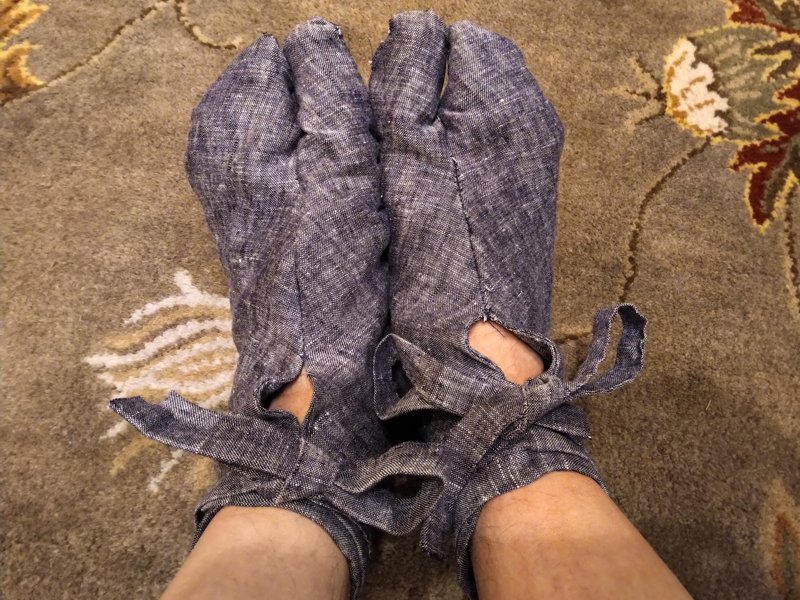
It’s not even half-way through the year, and I already have this year’s tabi foot coverings finished.
Tabi in blue linen
For those of my readers who are not familiar with this tradition, I started sewing my own tabi a few years ago to go with my Japanese garb. They are usually made from leftover fabric from garb projects, but it’s just regular fabric, so they tend to wear out pretty quickly. I found that if I make a pair a year, I can keep ahead of the curve and always have at least a few pairs of tabi that are not worn out and shabby looking. Usually, I wind up finishing a year’s tabi in January or February of the following year. Not this year! Free time and your wife hosting local sewing circles can do that.
These are made from the blue linen I used for the hippari top I made for the field clothing outfit from this past December. They’re sewn entirely by hand, including attaching the himo ties, which I normally do by machine. This was not a decision to be a stickler about it, just that I was sewing these to have some sewing to do while being social, so why not stretch it out a little bit?
These are apparently the eleventh or twelfth pair of tabi I have made for myself. Scary. Maybe the next pair will be impractically fancy. We still have some really nice silk brocade sitting around.
Making a couple of small karabitsu footed chests, and reached the stage of gluing the body of the chest together.
That’s a dozen clamps
It’s quite possible that if I was just better at cutting joinery, I woould not need quite so many clamps. Also, I’m using rice paste and not carpenter’s wood glue, so it takes hours and hours to dry fully.
Once the paste is dry, I can use pegs to fasten all the joinery, which includes securing the floor of the chest. This is the second of two karabitsu, so later this week I will be able to move on to the sanding phase.
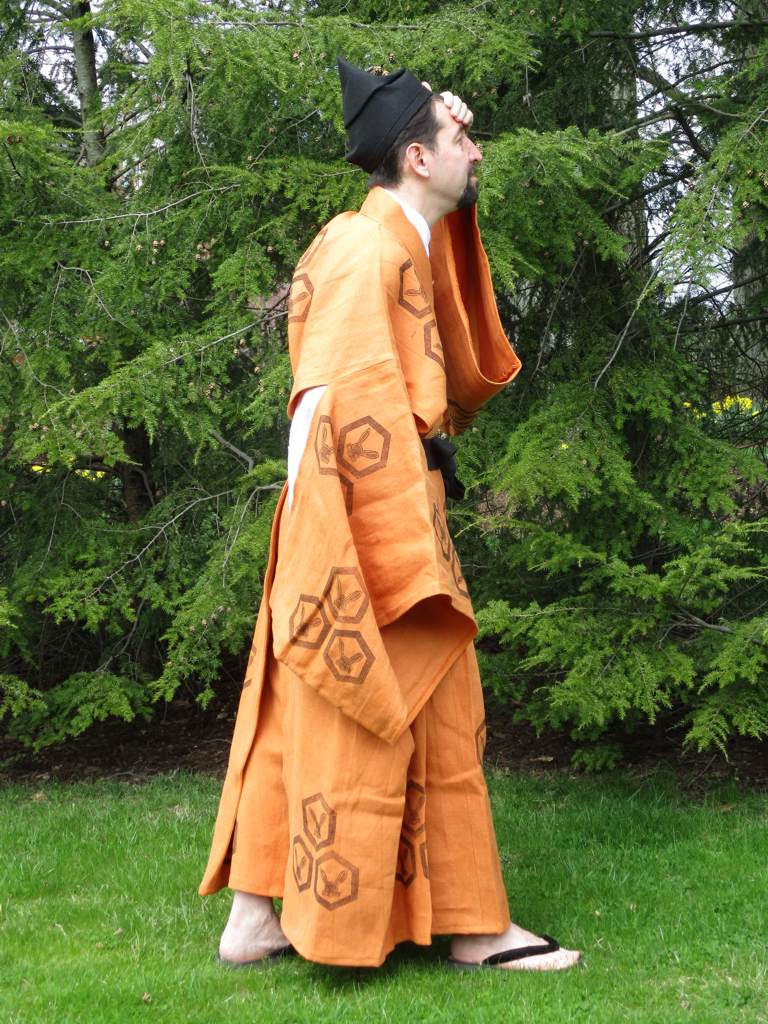
Almost two years ago, I received what is called my “Laurel Writ”, which is basically a command to present myself to the Crown of the local SCA Kingdom and accept (or decline) elevation to the Order of the Laurel. The Laurel is a “peerage” level award, recognized Society-wide but awarded at the Kingdom Level. In terms of rank, it is the equivalent of a Knighthood, but for arts and research instead of for fighting prowess and chivalrous conduct.
My “elevation garb” was a “Bunkan Sokutai“, the fanciest and most formal outfit my SCA persona would ever have had reason to wear. There are a lot of parts to this outfit, meaning not only several layers of garments, but several vital accessories. Sharon did all of the important layers of garments, and I did most of the accessories. One accessory I did not have ready in time is the gyotai.
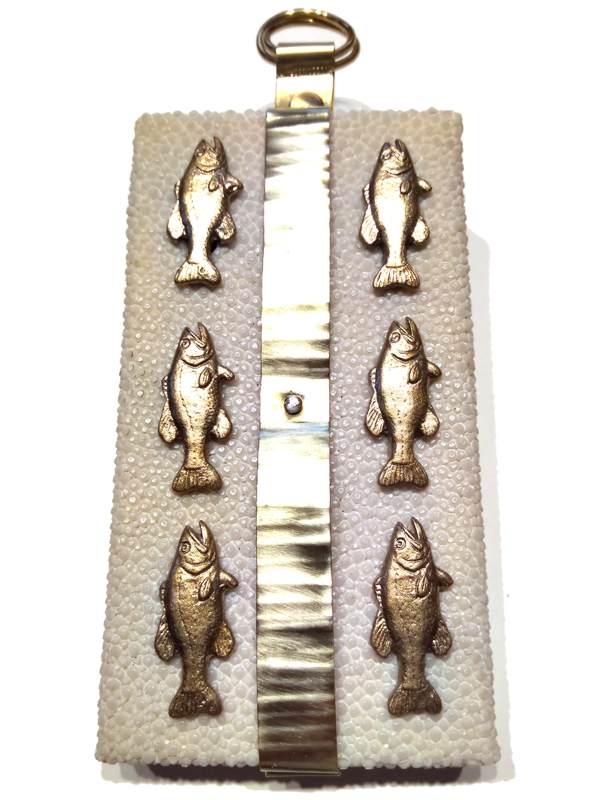
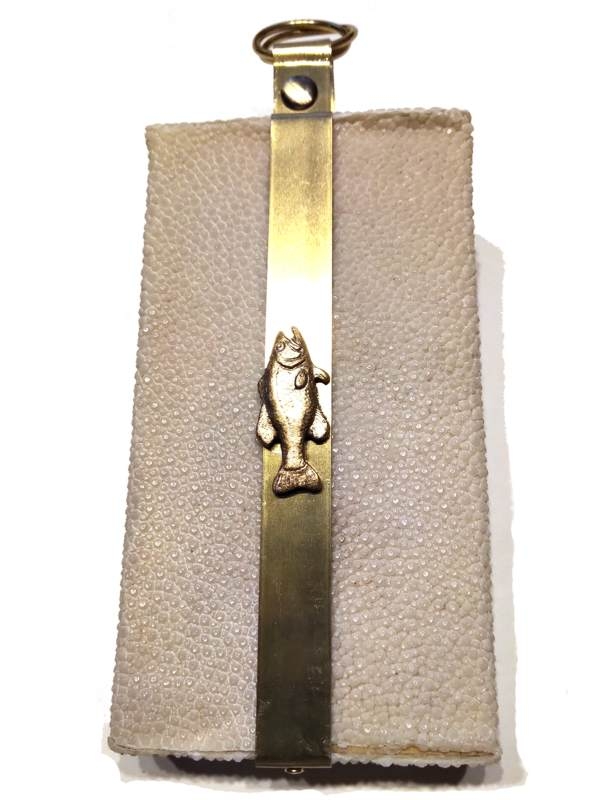
Gyotai translates as “fish bag”. This accessory is reserved for courtiers of high enough rank that they have access to the Imperial palace. Apparently, it started as a belt-hung charm that was actually shaped like a fish, but eventually became what you see below.
Gyotai (possibly Gyoutai)
I started with a block of red oak, 2.5 inches by 4.75 inches. Then, I covered it in real ray skin, attached with epoxy adhesive. Then, I hammered the brass strip for texture, and nailed it in place. It is bent over at the top, and riveted to hold the ring for hanging. The fish are pewter buttons. I had to paint them gold, and spray coat the gold paint for durability. On the other hand, the shanks of the buttons made it very easy to drill a few holes and attach the fish to the surface. There is one more fish on the back of the gyotai, and the brass strip covers up the terrible seam in the rayskin.
So, this project was two years in the intention, but it really only took two days in the shop to get all the work done. Considering that I haven’t even seen one of these in a museum, it feels so good to have one of my very own.
When I was in Japan for the TV show, they gave me the opportunity to visit with Makiko Tada in her studio and while I was there she taught me how to do “Kute-Uchi” hand loop braiding. I have since taken more classes in it, and done more studying. This craft, like finger loop braiding, has the disadvantage that once you start a braid, there is really no way to put the work down until it is finished. Also, if you want to experiment with the multi-person braids you actually need multiple people. That is, unless you have some “helping hands” to hold the loops for you.
I’ve seen several designs for these, but most of them seemed either too primitive or too engineered. Some are made of PVC pipe or other humble materials. Some have magnetic bases to keep them from shifting, but then you need a metal table. anyway, I thought that some wood would be nicer, and friction would probably be enough to keep them from shifting. A few hours in the shop, and here we are!
Helping hands in use, from above
Here you can see the kute-uchi hands in use. This is just a simple 5-loop braid, but I can stop at any time by sliding the loops off my hands onto the dowel ends. The bar in the center keeps the two sides separate, and fiction between the wooden base and the tablecloth keeps tension on the loops. If I need more tension for some reason, I can always put a weight bag on the base to increase the friction. the hands do need to move forward, as uptake from the braid makes the distance between the hands and the fixed point shorter as the braid progresses.
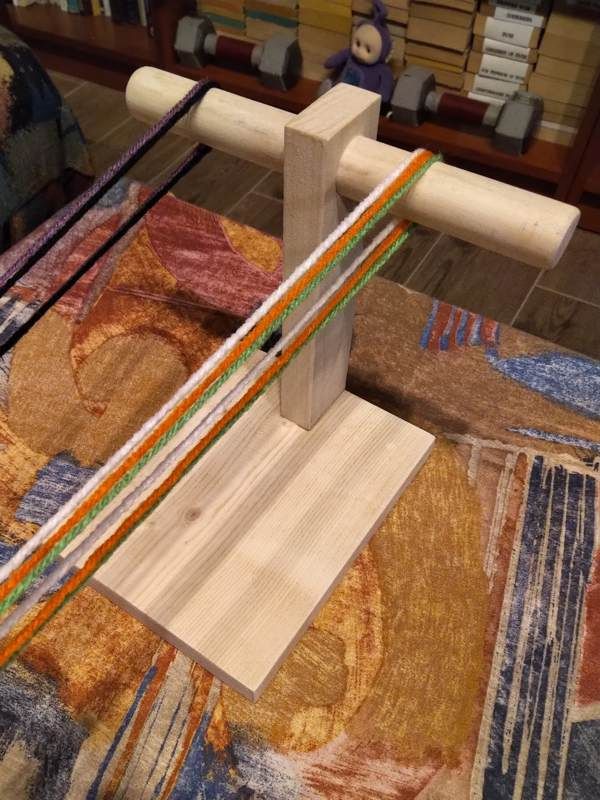
Close-up
Here’s a closer shot from the front. The dowel just goes through the upright post. A set screw keeps the dowel from sliding out. The upright is in a shallow mortise for stability, and a screw comes up from underneath to keep that attached. There’s no glue, so I can remove the screws if I need to take the whole thing apart for travel or something. There’s a bit of sealer on it to stabilize the wood, but no finish to make it slippery.
I actually made three of these. I needed at least two for making two-person braids, and why not make an extra one while I was working? I had three good pieces of dowel in the surplus rack.
I’ve been wanting these for a while, so it is really good to finally get around to making them.
Back in October of 2016, when I was in Japan for the TV show, I had a few “free” days in Tokyo when they weren’t shooting video and I could go do whatever I wanted. One of these, I walked from my hotel near the Shiba Daimon Gate up to the Tokyo National Museum, a distance of some three or so miles. One of the displays in the museum that day was a collection of wood and lacquer items. Within that display was a small collection of masu measuring boxes from the 15th century. Ever since that day, I’ve been wanting to recreate at least one of these boxes.
Masu in the TNM
Most people here in the West are familiar with masu as the wooden sake cups one sometimes receives with cold sake in sushi restaurants. That size, is a 1 goumasu. Five of the six masu in the TNM were 1 shoumasu. They have ten times the capacity of a sake cup masu. A thousand gou is a year’s supply of rice for one person, called a koku. A shou of rice is about the amount a person might buy in the market for a family.
The way a rice merchant would use a masu is to dig into the rice bushel with the box, and lift out a mounded boxful of rice. Then, drag a rod across the top of the box to level off the measure, much in the same way a baker uses a metal spatula to level off a measure of flour. ! shou of rice is about 1.8 liters, usually described as “about a half gallon”.
Here’s a better picture of just one of the masu in the museum:
Probably the best masu in the collection
This image shows some vital details necessary for recreating this kind of 1 shoumasu. The bottom is not captive within the walls, it is applied and extends to the full footprint of the box. This one shows significant wear, rounding off the bottom edges. The joinery at the corners is simple, more or less “box” joints, but with the huge half-height “fingers” I am used to seeing on boxes from this era. Interestingly, the joints “chase” around the box, and all sides are Z-shaped. The joinery is secured with two pegs per finger. The rim of the box is covered in copper strips. These strips keep the top edge of the box from being worn down by the rubbing of the leveling rod. the copper strips appear to be nailed on.
Anyway, it’s taken me some time to get around to completing my masu. First, I had to calculate the measurements needed to achieve the 1.8 liter volume. If I planed down some cedar boards to half-inch thickness, my walls needed to be (amusingly) seven inches long and three inches tall. I’m told that the actual volumes of the masu in this collection vary significantly, but whatever. I started working probably two years ago, ut the planed boards sat on my workbench until recently. I even got some sheet copper and cut it into strips, and that sat waiting too. My copper is about half as thick as the strips in the museum masu, and I think that the walls of the boxes may be thinner, but I do what I can. I was able to cut all the joinery by hand, and hand-drill the holes for the pegs using a yotsume kiri gimlet. I glued everything together with rice-paste glue, which may or may not be authentic, but is certainly closer than if I’d used wood glue.
Anyway, here’s my masu with its measuring rod:
I was even able to get copper-plated nails to attached the strips. It feels so good to finally complete this project after all this time. This kind of common object is the kind of thing my SCA persona would have been familiar with as a mundane object in the marketplace, so it helps me complete the mental picture of what his world was like. I can now hold in my hands something I’d previously only seen behind glass in a museum.
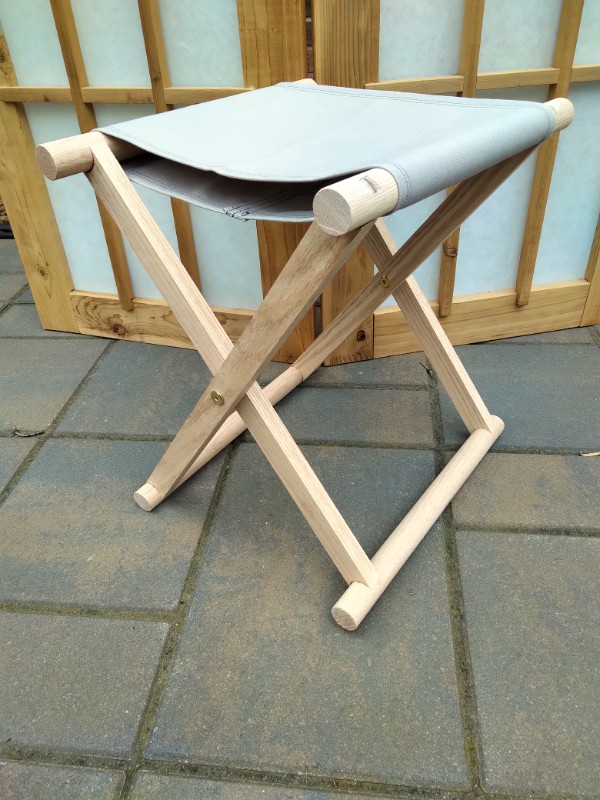
Last Pennsic, a friend asked me if I could make a shogi for her like the ones I have made for us. I said yes, because I had some things I wanted to try. I tried out a new method for the leg joinery, and a new method for sewing the seat fabric, earlier this year. I bought some new hinge hardware back before the virus shutdown, so it was time to get cracking. I started in earnest a few days ago, and I finished it up today.
Shogi #6, for Caellin
Now, if we ever have another SCA event, this stool is ready. If you zoom in on the picture, you can see that I used the same wedged through-tenons with curved shoulders that I used on the previous shogi. The only real difference is that I bought some connector bolts to use as the pivot hinges where the legs cross. There is also a bronze bushing in there to make sure the hinge works smoothly. All this special hardware was a little pricey, but I think it will be worth it in the long run, and even thought the hexagonal recesses in the bolt heads look a little modern, I think the hardware gives the completed stool a much more finished look.
Going through my photos from last May of the Japanese garden at the Museum of Fine Arts in Boston, I found this image I took that I thought would make a good desktop background. Please feel free to download it for your personal use.
Heart of Heaven
It is of the “dry garden” portion of the garden, and was taken from almost ground level to simulate the experience of being part of the garden yourself. The name of the garden, “Tenshin-En”, translates to “Garden of the Heart of Heaven”.
Kingdom coronation was held virtually this weekend, so we got dressed up at home for the teleconference. Here’s a comparison of the gentleman in the “Nenbutsu Gathering” scroll with me in my daimon hitatare.
First complete garment from block-printed fabric is this kataginu vest. I have a much larger project I’m working on, but this garment enabled me to do a batch of test prints like the one I posted the other day. Later, I was able to make a garment from some of the tests.
Kataginu front
Kataginu back
It’s really super difficult to get all the wrinkles out of linen this thick. It’s great stuff, going to make awesome garb, but wrinkly. The printing came out good. I had to print back mon on both pieces before sewing, because printing across the seam with allowances on the inside would not have worked as smoothly.
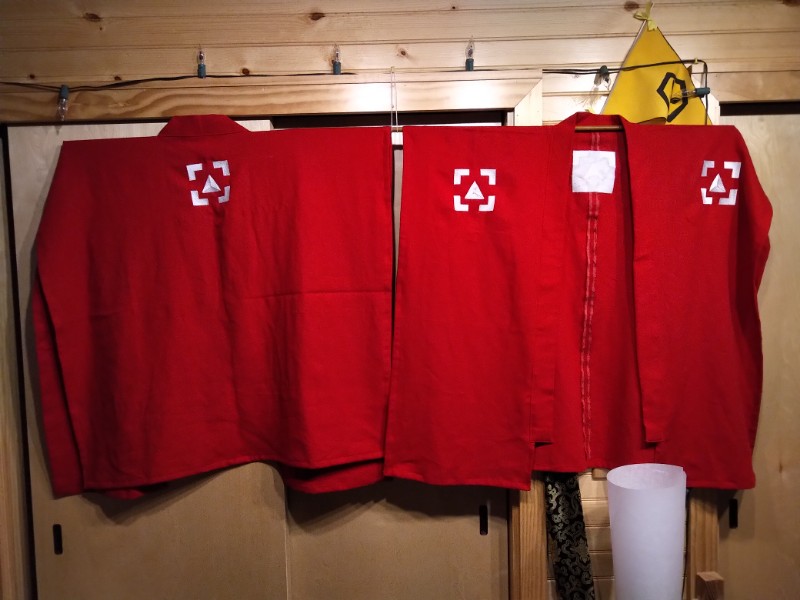
Recent experiments applying the mon of Clan Yama Kaminari to fabric have demonstrated to me that I am most happy with machine embroidered versions. They are durable, attractive, and can be made by a robot. This last is handiest because I want to embark on a project to make probably several dozen of these so that when we do something like march in a festival parade or rocess into court as a group, we can have a uniform look. Here are two prototypes I made over the last few days.
Embroidered Kaminari Kataginu
Even with a robot to do all of the embellishment work, it’s still labor intensive to get the fabric loaded onto the machine just right to get good results exactly where you want them. It also takes about ten minutes to complete each mon, so that’s going to be a lot of time if we make a whole bunch of these.


