Due to a confluence of funds and enthusiasm, I came up with the idea of making a new entry gate for the Debatable Lands camp at Pennsic. The camp had a gate, and there wasn’t anything particularly wrong with it, , but given that the Debatable Lands just celebrated the fiftieth anniversary of it’s founding, I felt a shiny new gate was in order. It has actually been more than ten years since I made a camp gate, so I was able to apply what I have learned regarding complexity of design and total project weight, and minimize those vital factors.
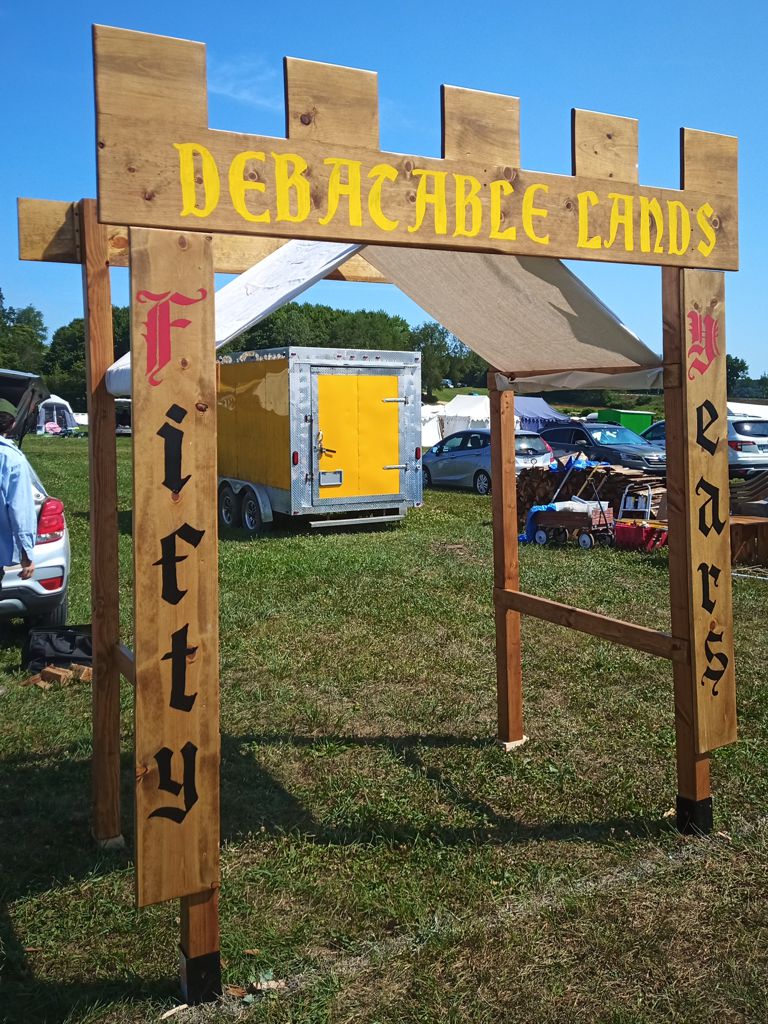
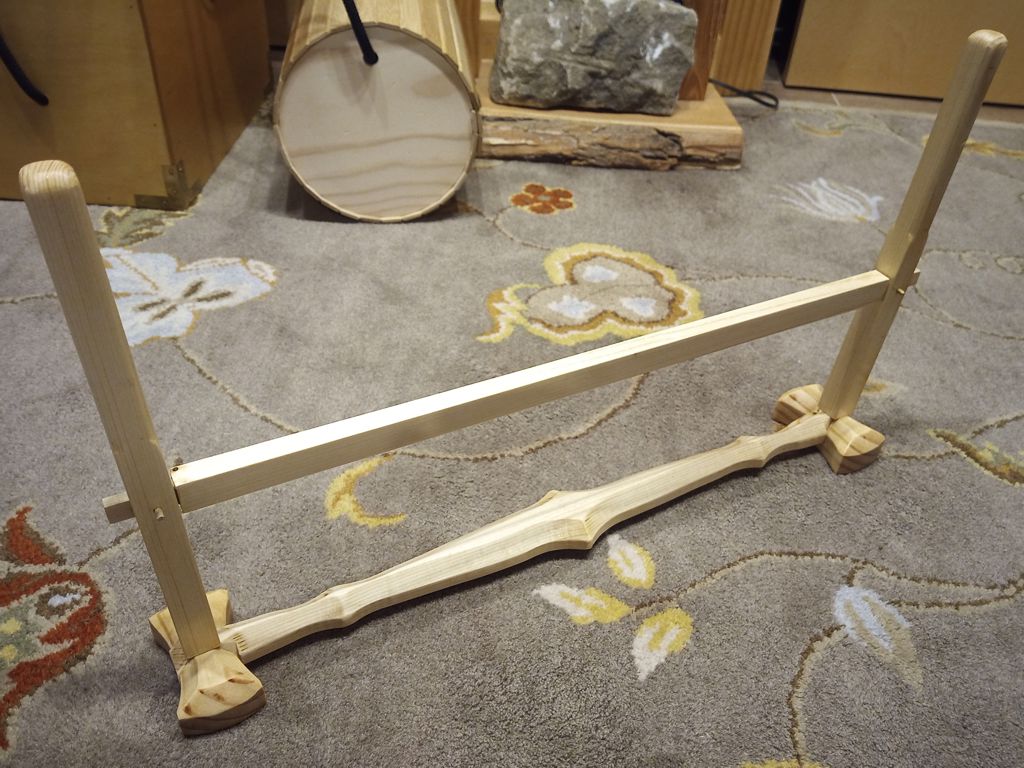
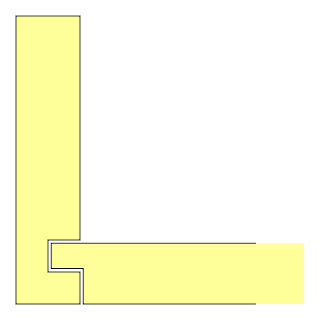
The vertical posts are four 8-foot pine 4by4s. They are untrimmed, but they have 3.5-inch slots cut in them to mate with the horizontal members. The horizontal members are 4-foot lengths of pine 2by4, and they have 3.5-inch notches cut at each end to mate with the slots in the vertical posts. The simple joinery increases rigidity and makes sure each horizontal member is in the right place. The lower members are at a good height for use as hand rails or butt rests.
The front top panel is an 8-foot 1by12 that has been crenelated using 5 pieces cut from a 6-foot 1by10. Battens on the reverse secure the crenelations and assure that the panel is aligned properly to the vertical posts. I painted the “Debatable Lands” part myself. The back top panel is an 8-foot 1by10. It is currently not decorated, but that’s plenty of room for an inspirational motto. “Salve Accolens” would be reasonable, but I decided to let others decide what goes there. The two top panels are really the only thing connecting the sides, but they are tall (wide) enough that I’m hoping that will be fine.
The two decorative side panels in the front are 6-foot 1by10s. Owen Tegg painted the lettering, and it is amazing. They say “Fifty Years” in honor of our anniversary, but they can be replaced or repainted easily in the future. It will be a shame to see all that ornate lettering go, though. I wanted to leave a lot of room for creativity from year to year. Since they are just flat panels, anybody can make new ones if they want, and attach them to the gate once it is up.
There is another 4-foot long piece of 2by4 that runs from front to back between the top panels. This provides a little more stability, but its real purpose is to serve as a peak for the awning. The awning is just a long canvas drop cloth from the hardware store. It should provide a little shade from the midday sun and a little shelter from light weather, but I don’t imagine it is waterproof.
All the wood pieces are stained and polyurethaned. A quart of polyurethane was just enough to coat all the pieces and seal the ends. The gate is assembled using regular 3-inch long construction screws.
Given the current price of construction lumber, this whole project (including hardware) cost around $400. I had a lot of help cutting, decorating, and assembling this gate. Thank you Brandubh, Turleough, Aaron, Catalina, Niall, Owen, Forveleth (who would have helped but did not get a chance), and to the officers of the Barony for approving this passion project in the first place. I hope the Barony likes our new gate!
The funding for this and other passion projects was available because a member of our local group passed away suddenly at the age of 33, and his family asked that memorial donations be made in his name to the Barony. Ronan took tremendous pride in the Barony and loved spending time in the Pennsic camp with his friends. He would have loved helping with this project, and I hope having it up at the front of camp would have made him happy.