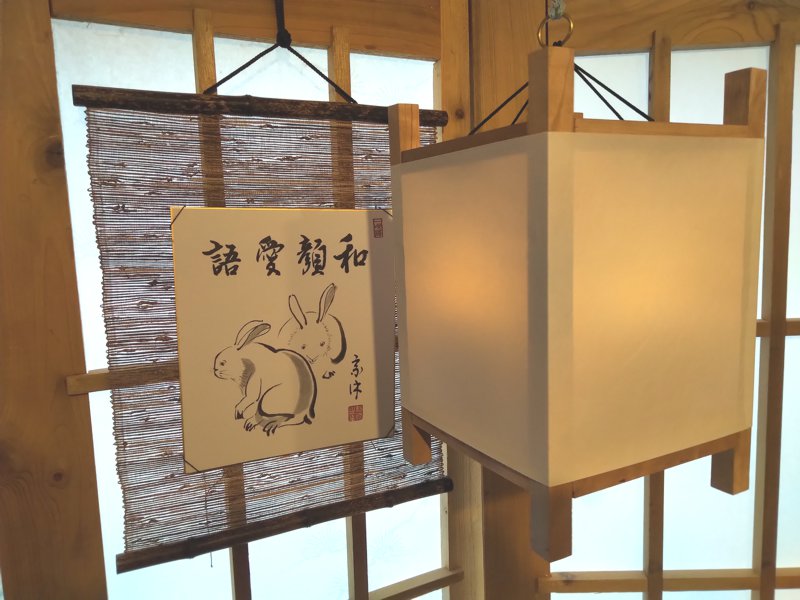
This is the third lantern in a series of at least six. This simple Japanese frame lantern is made from some Western Pennsylvania cherry lumber that I bought a bunch of years ago and am still working scraps out of. It follows the same design as the Oak Solar Flicker Lantern and Maple Solar Flicker Lantern before it.
Lantern in cherry
I have a new method for applying the paper that I think yields a much tighter and smoother result. I’m using Warlon Taf-Top shoji paper, so I can’t just dampen the paper to shrink it. Unless the lantern is perfectly square, wrapping a correctly-sized strip of paper around it leaves wrinkles or bulges. Instead, I cut the paper oversized, apply it to the lantern, then trim the paper down so that it is perfectly straight and flat. It watses a bit more paper, but I think it is more attractive.
The shoji in the background were made about a decade ago, and are made from cedar. I bought the bunny painting from an antique store.
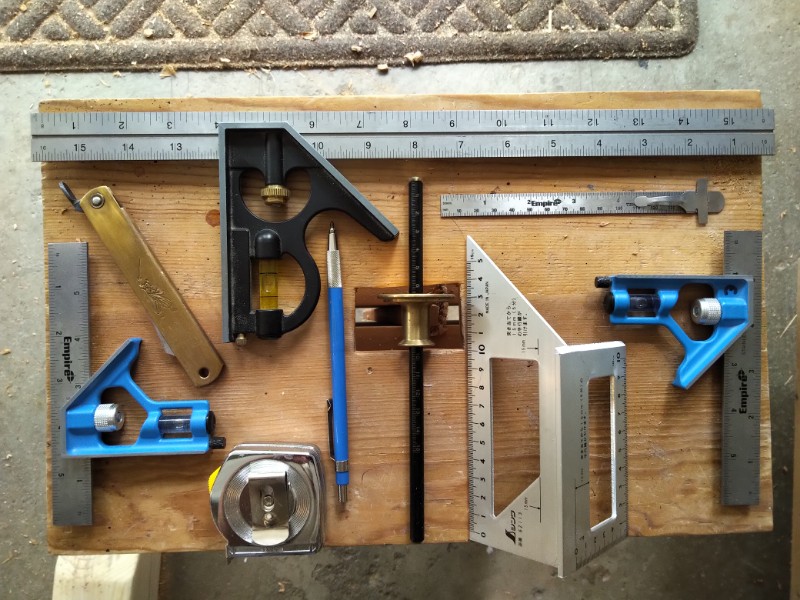
I’ve been working on a new large carpentry project, and it involves a bunch of joinery that for some reason I have decided to cut by hand. Everything needs to be measured out and marked, regardless of hand or machine cut, since I almost never trust jigs or templates for this kind of thing. Here’s the kit of measuring and marking tools I have assembled for this particular project.
Tools
So yes, there are three adjustable squares here, so that I don’t have to keep setting and re-setting them for the different lengths I need. The tool right in the middle is called a wheel gauge. You set the length you want, run the large brass bit against the edge of the board, and the little metal wheel at the end cuts a groove in the wood. I do have a Japanese kebiki gauge, but I have a difficult time getting accurate distances with it. The larger aluminum tool next to the wheel gauge is a modern Japanese marking square that is awesome because the large sides let you mark around the corners of lumber, so it’s easier to get straight cuts on 2x4s and other similar pieces. The small metal ruler is very useful for drawing lines between marks, and inserting into small holes as a depth gauge. I mostly mark things out in pencil using the blue 2mm drafting lead holder. but the pocket knife in the upper left is helpful for cutting a groove to start saw cuts, particularly on rip cuts.
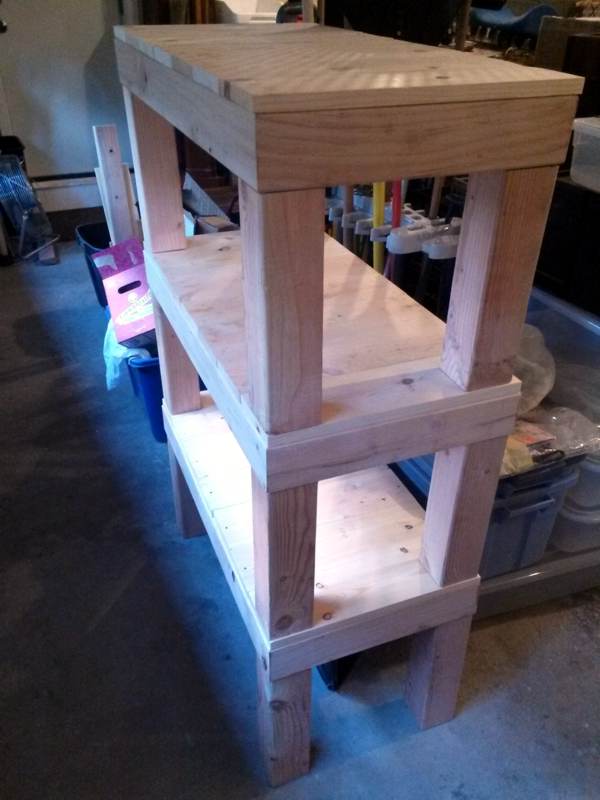
Some years ago, I made a pair of low Japanese sawhorses for my workshop. They’ve been great, and very useful (mostly for keeping lumber off the floor in the garage), but it was time to take the next step up. My rickety western sawhorses spend most of their time sitting outside in the rain and snow, so they are not in very good shape. A set of mid-height Japanese sawhorses would be nice to have, because they are designed to break down into pieces for transport and storage.
Sawhorses Four
These sawhorses are about 24 inches tall, 24 inches long, and 22 inches wide at the feet. This height is just short enough that I can put my knee on a board to hold it while sawing, but tall enough that I don’t need to worry about scraping my saw along the ground. All the joinery is mortise and tenon, and there is no metal hardware in anything.
They are made almost entirely from pine. Given their modest stature, I could cut all four horses from three 4×4’s, two 2×6’s, and one 2×4. This means that there is only about forty dollars of material in the whole set. The pegs that secure the feet to the legs and the wedges that secure the legs to the stretchers are made from some surplus walnut I had in the shop. It’s always best to make the fasteners from wood that’s harder than the wood it is securing, but maybe walnut was an extravagant choice.
I wanted to make these from cedar instead of pine, but it turns out that these days cedar is five times as expensive as pine. It used to be only twice as expensive as pine. My next big woodworking project is going to cost me $500 instead of $100 for the lumber alone. Gasp.
I cut all the pieces to length by hand, but I used the mortising machine to cut nearly all of the mortises, and the band saw to cut nearly all of the tenons. I smoothed the walnut fasteners with a hand plane, though. After completing all of the shaping and joining, it took me about three hours with the orbital sander to clean everything up and remove most of the saw marks.
When taken apart, I can fit all the pieces for three horses into a single large (27 gallon) storage tote. This means that in the winter I can put the horses away in the garden shed instead of having them sit outside like the old ones.
The tachi is a type of Japanese sword that is similar to a katana, but it is worn differently, has different fittings, and is usually used as a more of a formal/ceremonial sword compared to a warrior’s katana. I bought a small tachi as part of my mission to recreate a full bunkan sokutai.
When not in being worn or in storage, the tachi would have been displayed nearby the bearer in a vertical stand called a tachi kake. These are readily available to buy, both as new items and antiques, but of course I wanted to make one myself. I was able to settle on a design, and I still have an excess of surplus wood in the garage.
Tachi Kake Before Finishing
Here’s what it looks like after cutting and shaping, but before finishing. It’s a little easier to see the shapes of the pieces. This is all pine lumber. The upright and the bracket at the top are just 3/4″ thick cut from 1by. The brace at the bottom of the upright is 1/2″ thick pine I had around; most of the examples I see online are only 1/4″ thick. The base is cut from some surplus 2by, to keep it bottom-heavy when unoccupied. The brace is fitted in a slot that I cut all the way through the upright. Tenons at either end of the upright fit into through-mortises for ease of assembly and disassembly.
All told, this item is about 26 inches tall when fully assembled. The tapering curve on the upright piece is one of my favorite shapes ever. I did almost all of the cutting on the band saw, though, because it made things like this curve so much faster to make. I also used a router to bevel and round over all the edges on all the pieces to give it a softer look.
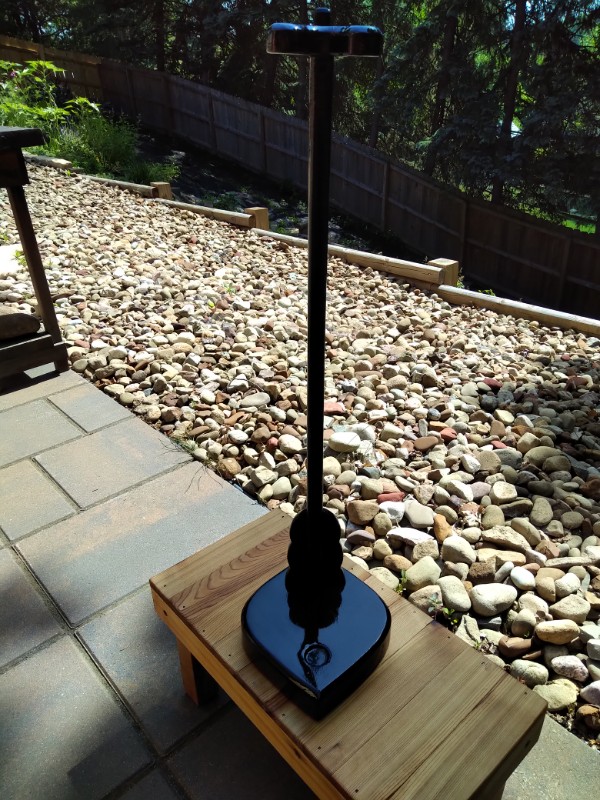
Tachi Kake After Finishing
Here it is after about a half-dozen coats of black-tinted polyurethane. This stuff makes a good affordable lacquer substitute, and it dries in hours instead of weeks. I sanded the finish between every couple coats, but it still needs some final polishing. I also want to add some embellishment like I did for the kyousoku arm rest, but that might not happen until autumn.
For a better sense of scale, here’s another picture of the tachi kake before finishing, with my ko-tachi in the stand like it is supposed to be:
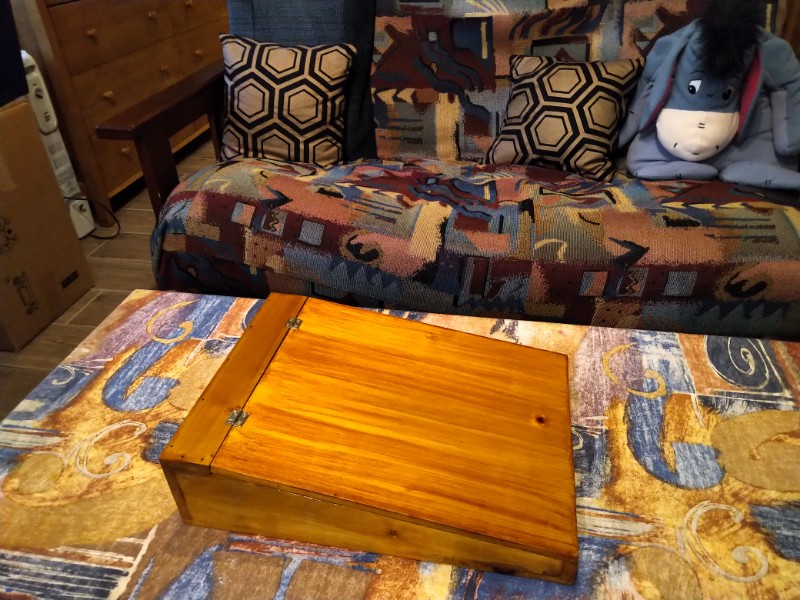
When I was getting the Debatable Lands Woodworking Guild started, I polled the people who were attending planning meetings to see what projects we could work on as a group to produce things for the Barony. One of the ideas was to produce “portable desk” type scribal boxes that the Baron and Baroness could gift to scribes. It’s taken me some time to get around to it, but I was finally able to plan out what such a thing might look like, and use up some surplus wood from the garage to make a prototype.
Closed Scribal Box
This simple, hinged-lid box is made entirely from pine, and finished with amber shellac. The walls of the box are half-inch thick, and the larger surfaces are 3/8″ thick. both thicknesses are the result of planing down some 3/4″ lumber to remove severe cupping warpage. The top and bottom were made from some 1×12 shelving, so I was able to make the full width of the box from a single piece without resorting to plywood.
The work surface is 11 inches wide and about 12.75″ tall, a fine size to accommodate 8.5″x11″ or 9″x12″ paper with some room to spare. A slight slope should make work a little easier on the wrists.
I have no historical examples for this kind of box, I am merely imitating other scribal boxes I have seen in use around the SCA.
Open Scribal Box
The interior of the box is about 10 inches by 14 inches, able to hold supplies slightly larger than average to a depth of about 1 inch at the front and 3 inches at the back. It’s slightly less than that because I decided to add the two battens underneath the lid to support the thin wood during use and keep it from warping.
The box is assembled using modern wood glue and wire nails, and finished with three coats of amber shellac. I’m not sure why my shellac came out so streaky this time. It could be that the shellac needs more alcohol in the mix, or that it was very hot in the shop yesterday causing the finish to dry more quickly than it could even out.
Because I had suitable material on hand, shaping and assembly of the box took less than a day. I did some hand sawing, but a lot of the sawing was done on the band saw. Assembly was entirely by hand, even to the level of hammering in the nails by hand to avoid blowing out the thin wood sides with the nail gun.
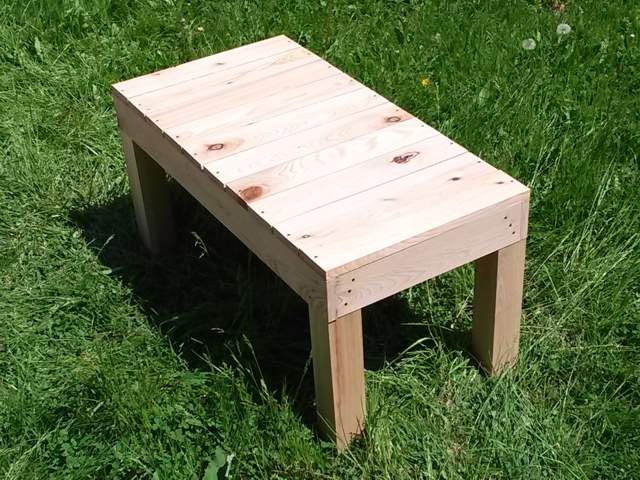
Long-time fans of my work my remember the nine endai benches (one, two, three through five, and six through nine) that I’ve made in the past. These are great, but they are 18 inches tall. As the endai is a half-step between the ground and the en of a Japanese dwelling, I wanted to make something that was a half-step between the ground and an endai. Even though there’s no Pennsic this year, I wanted to tackle this little project and get it off my list. I recently sorted through all of the surplus wood I have, so I knew I had enough lumber on hand to tackle this project without having to go and buy anything.
Endai Stepstool
It’s entirely red cedar, and much of a style with endai six through nine, but roughly half-scale. Instead of being 36″ long, 18″ deep, and 18″ tall; this one is 18″ long, 9″ deep, and 9″ tall. The legs are 2×2 instead of 4×4. It’s a mini-bench.
I’m a bit disappointed about the external fasteners on the legs. I wasn’t able to do the joinery I usually do on the legs, and there isn’t a lot of room inside the apron for screws. Even with four screws on the interior of each leg it was a still a little rickety, so I gave in and put some screws in from the outside.
I put a bit of boiled linseed oil on it, to enhance the color and keep the wood from drying out. I’m pretty happy with it.
Quite often, things sit on my project “to do” list for a season or a year until I’m absolutely sure I still want to make that thing. This project entered my list just two months ago, but it was such a motivating idea that I jumped right in on it after completing the smallest karabitsu. I bought all the lumber and other materials at Home Depot, and used almost all the power tools in my shop, so this is nothing that took great talent, uncommon materials, or specialty tools. Probably the only “talent” that made this project possible is the ability to plan, and the ability to follow plans.
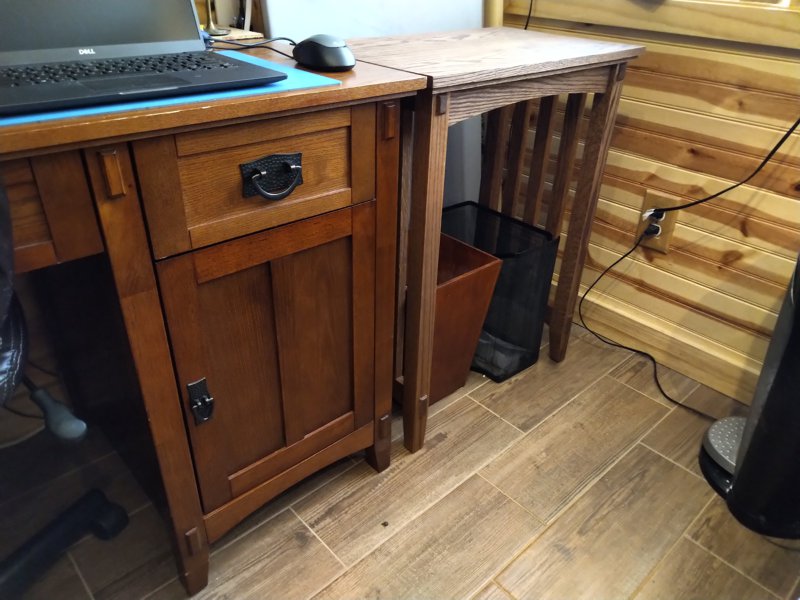
Anyway, here it is. It’s an end table (or side table, whatever) in the “Arts & Crafts” (or maybe “Craftsman”) style. Made from red oak, stained a slightly darker brown, and finished with amber shellac.
Arts and Crafts End Table
The exact style is important because I wanted this table to go right at the end of my desk, and match the look of the desk as closely as possible. I have a file cabinet at the other end of the desk, and it came from the same furniture collection, and I though that having two match each other and a third not match would be visually jarring. They don’t even sell this desk any more, so buying an end table from this collection was not going to happen. What the heck, I’m a woodworker, right? Let’s just make one.
Table before finishing, next to desk
The only problem with that is that I have never made real furniture like this before. Years ago, I made the stereo cabinet, but I kind of winged it. I had to make a bunch of decisions about how such a thing even should be made, because the desk itself is mostly fakery. For instance, the ends of the “through tenons” that you can see on the desk are glued on. They are not even end grain! The “tenon ends” just under the surface of the desk are taller than the horizontal members of which they are supposed to be the ends. My tenon ends are really the ends of the horizontal members. My mortises are really full through-mortises. The ends of the vertical “ribs” really are tenons that fit into blind mortises in the horizontal members. The “inset molding” beneath the surface is not just routed onto the underside of a thick piece of wood, it’s a four-piece frame of 3/8″ wood that attaches the frame to the underside of the surface.
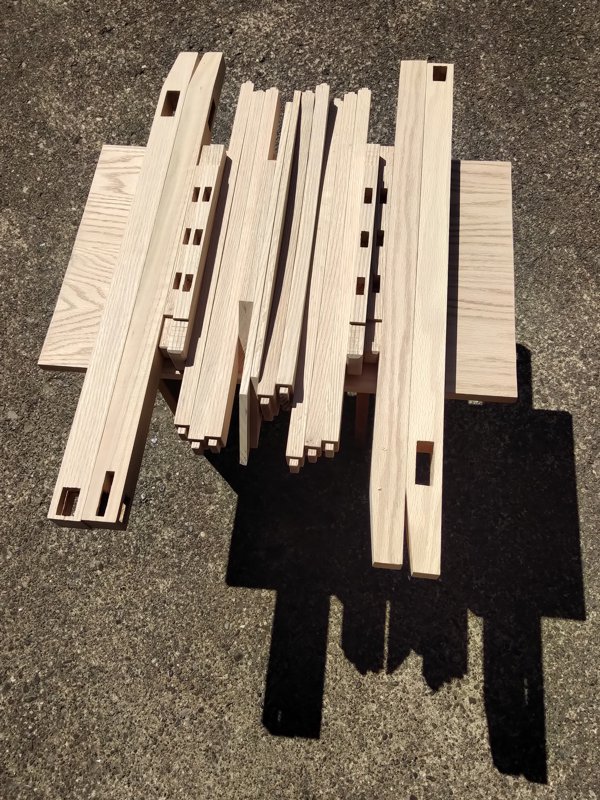
When you do this much planning on a project, though. You start to think about the project as a bunch of parts. It becomes very important that the pieces match the specification, and that each match the quality requirements of the project. However, it’s still just a bunch of pieces.
The pieces of an end table
Then, as the project progresses, things start getting more coherent. The first swipe of the staining pad and a stick of lumber starts to look more like a table leg. The pieces start getting assembled, and suddenly there is a piece of actual furniture. It’s almost magical. Suddenly it’s furniture!
The unfinished table after dry-fit assembly.
Then you add two coats of shellac (three on the top surface) and write a blog post, and suddenly the project is complete!
Way back in 2012, I made a regular size karabitsu entirely by hand from cypress 1×12. I developed a set of ratios that enabled me to design a karabitsu based on the width of the wood. The length of the lid is twice the width of the wood, and so on down. Later, I made a small karabitsu out of cypress 1×10, using the same ratios. I decided to make a pair of even smaller karabitsu out of cypress 1×8, planing the wood down to half-inch thickness because I had purchased a planer. I cut all the pieces to length, and started cutting the joinery, but then life intervened. The pieces sat in a box next to my workbench for at least a year. Then we moved. Then the peces sat in a box on my workbench for four years. It was time to complete this project and get these dang things off my workbench.
I cut all the joinery by hand, but I quickly gave up on doing everything by hand. I used a band saw to cut the legs, a router to shape the legs, a sander to smooth out the boxes, and a drill to make holes for the pegs that secure everything. I did decide to use rice paste to assemble the boxes instead of using modern wood glue. I used more hand-mixed blonde shellac for the finish, and now finally these are done.
Two Small Cypress Karabitsu
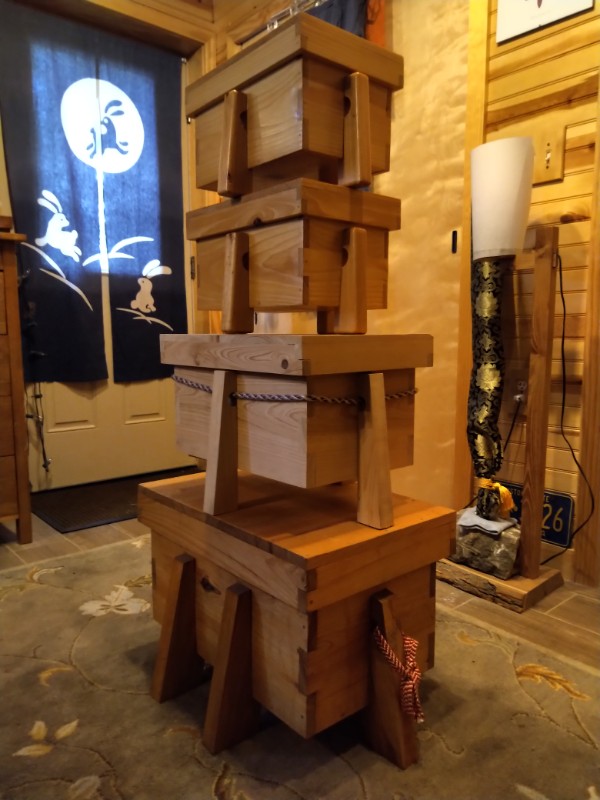
Here’s an image showing all four karabitsu stacked up, so you can compare sizes:
Four Cypress Karabitsu
I don’t know quite what use I had in mind for these when I started them. They might be useful for carrying one person’s worth of fest gear or something. I’ll have to make some braids for them. At least with two of them, they can balance at either ends of a carrying pole.
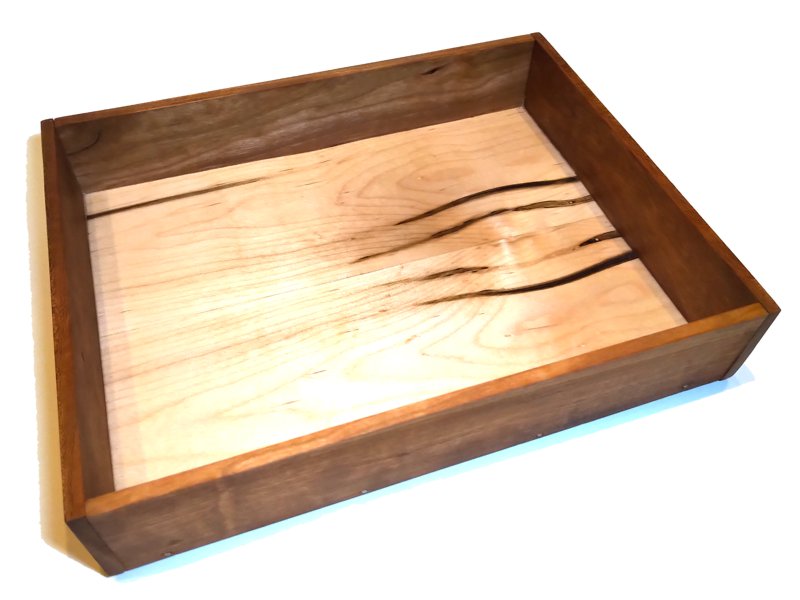
Just in case you are under the impression that everything I do is always perfect, here’s a little project I had to make because I messed up my first try on the Sake Cup Box project. Sometimes I kind of “wing it” on projects, making decisions based on dimensions that are are penciled on cardboard boxes or post-it notes instead of sitting down to draw up formal plans and doing calculations. As you might expect, sometimes this bites me in the butt.
I made this box bottom, then when I tried it out with the dividers to check for size, I realized it was too small. I set it aside while I started over on a new box bottom, kept it aside while I made a lid for the Sake Cup Box, then I made a lid to fit this “surplus” box bottom instead of smashing it to bits in frustration.
Surplus Box Bottom
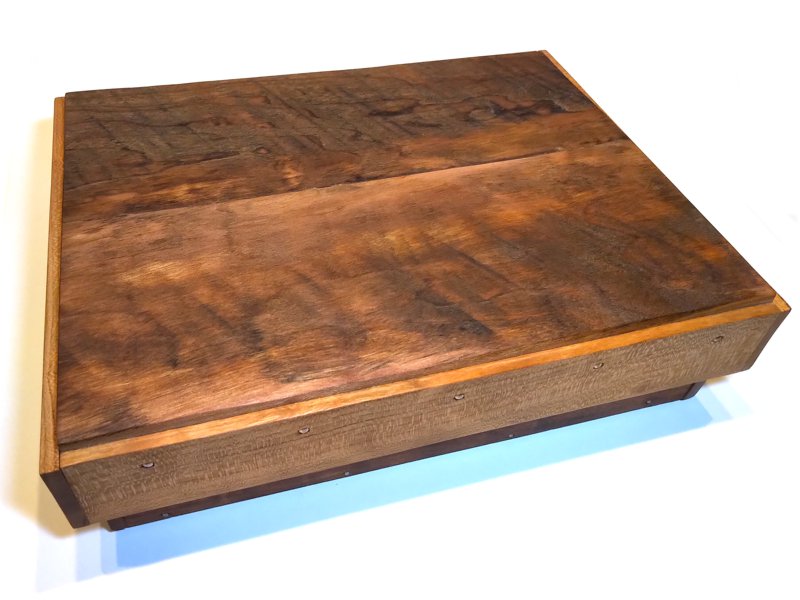
This time, the top of the lid is made from more strips of cherry, edge-glued together. I am getting tired of seeing this big stack of cherry scants in the shop, so this was a good way to use up a handful of them. The walls are also cherry strips, but I was able to get better glue joints this time, so there is no metal hardware. Hopefully, the whole thing doesn’t wind up smashed to pieces at some point.
Cherry Surplus Box
The floor is maple, resawn and bookmatched, but as this was my first try it is much more uneven than the floor of the Sake Cup Box. In a way, it’s a good thing this one was unusably small because the bottom it’s definitely not as nice.
The whole thing got the same walnut oil finish as the Sake Cup Box, because why not, so it also spent the last month in the drying closet. I’m no entirely sure what I’ll use this box for, but I am sure that I will use it for something. It’s big enough to hold 16 tama and some braiding supplies, and since it obviously matches the Cherry Marudai, maybe that’s what I will use it for.
It spent a month in the furo, and now it’s ready to show off. This was one of my big projects last month, and it has been on my to-do list for a while.
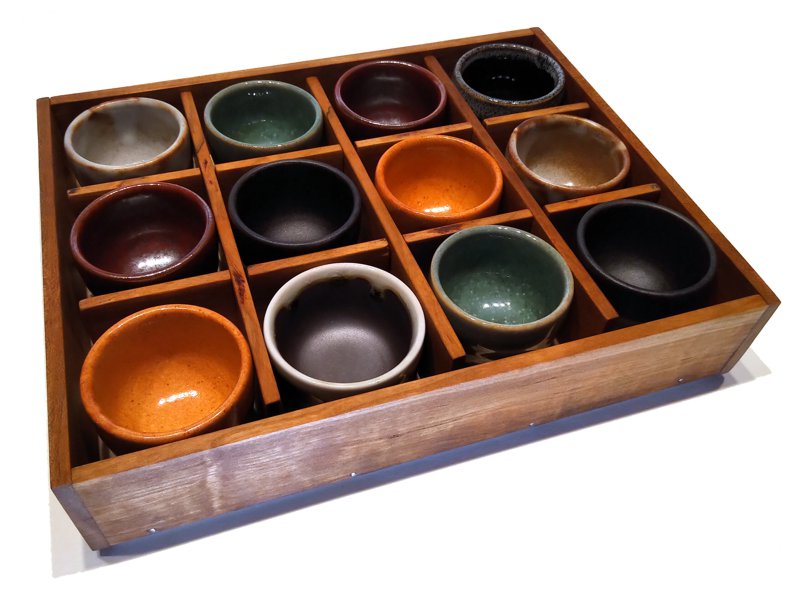
Back at the SCA 50-year anniversary event, we purchased a dozen sake cups for a very good price from a merchant. Since a dozen is one box of cups, the merchant threw in the box so we could safely transport the cups home. This was just a cardboard box, so we have been keeping the cups in a plastic bento box ever since. The cardboard dividers between the cups got destroyed at Pennsic last year, so I made some new dividers from cherry, but still sized to fit in the plastic bento. Now, I have made the final box.
The Sake Cup Box
The top of the lid is made from some rough-sawn lumber I salvaged from Mr. Arimoto’s workshop during the restaurant furniture project. The walls of both the lid and the box body are made from off-cut cherry strips from making maurdai. I was having some trouble gluing the strips to the lid and floor pieces, so all the joinery is secured with brass escutcheon pins. This should also make it a little more durable. It’s finished with food-grade walnut oil, which is why it had to spend a month in the drying cabinet. That oil takes a really long time to cure.
Here’s what it looks like with the lid off:
Sake Cups in Box, with Dividers
The dividers are neither glued together, nor are they glued in. If I need this box for something else later, they will lift right out. The floor of the box is some resawn and book-matched maple that I had in the shop. I didn’t have enough or thick enough cherry left over. It started as 4/4 (roughly 1-inch thick) maple, so I resawed it to roughly half-inch thickness, then sanded it smooth and even.
Empty Sake Cup Box
I am really super-happy with the way this came out. It is significantly larger and heavier than the old plastic box, but it is also significantly classier.


