Hey, I think that I have mentioned here that I am a fan of Japanese instrumental rock band MONO. Check out this video for a track off their next album, which won’t be released for two months.
MONO’s Riptide
Don’t turn your volume up during the quiet beginning. The keyword for this album is apparently “dynamic”.
A few weeks ago, Sharon hosted an indigo dyeing activity at our home. Some people came over and we spent all day dunking fabric in dye pots. I did some small test pieces for various techniques, but I also twisted up some big pieces of silk broadcloth, and then I made this kosode from that fabric.
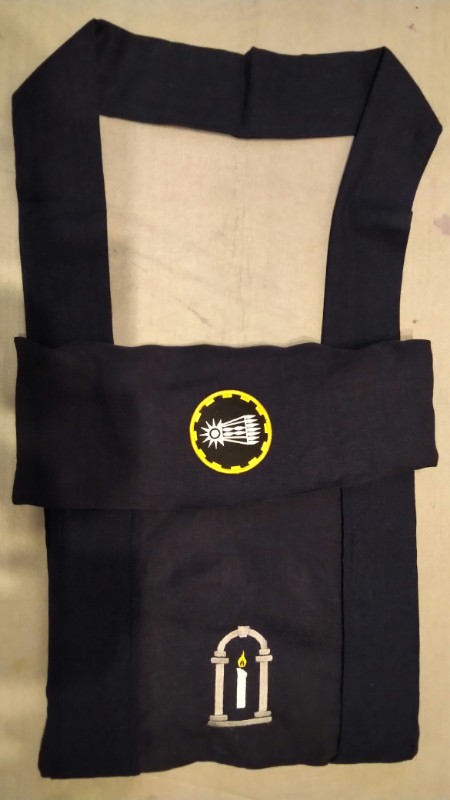
One of the martial activities in the SCA is called “Thrown Weapons”. Participants throw handled metal weapons such as axes and knives at fixed targets for scores. If you can achieve certain scores during a timed exercise, you qualify for different ranks. These belt favors are meant to be given to those participants who have achieved the required skill levels. The background color of each favor denotes the rank: black for Thrower (0-29 points), blue for Verfur (30-59 points), purple for Caster (60-79 points), green for Huntsman (80-99 points), and red for Marksman (100-120 points).
Each is machine embroidered on cotton twill fabric. The favors are about 7.5 inches wide and 18 inches long, meant to be doubled over a belt. The badge is 3.5 inches in diameter. The fabric is doubled over into a kind of bag, inside which valuables or authorization cards can be stored. I made six of each rank, thirty in all. Even though the machine did all the hard work, there was still a bunch f work setting things up, switching threads, and completing the favors. It took me a while.
Like many people, this winter was pretty bad for me. The isolation at home, the chaotic election, the violent attempt to overthrow a democratically elected government… I realize things were even worse for people who actually got sick, but the rest of us still had a lot to deal with. To help fight the depression, I bought one of those full spectrum lamps to at least help combat the winter blahs that are caused by lack of sunlight during the Winter. I think it helped, even if it was just the feeling that I was trying something new.
I bought a small-ish, flat-panel light that I could mount on the wall over my desk, or place off to the side on a table. It works great, and has a timer function so that I can chunk out my work day. The only problem is that its modern aesthetic clashes with my rustic Japanese decor preferences. So, I made a cedar “shoji” frame to disguise the lamp.
This is the lamp, a HappyLight from Verilux
The cedar frame slides down over the lamp
The frame does not interfere with the wall hook, table stand, or power jack
From the front
I can’t show you what it looks like with the light on, because the lamp is so bright that you wouldn’t be able to see anything else in the photo besides the glowing rectangle. I am thinking of adding some kumiko lattice-work to the frame opening, but kumiko are so trendy right now that I don’t know if I can bring myself to do that. Honestly, if one more person responds to me saying “I do some Japanese-style woodworking.” with “Have you tried kumiko?” I may stop discussing woodworking entirely.
I started a new job back in September, while the office was completely closed. I about reached the end of my work-from-home productivity rope this Spring, so I appealed to my boss to be allowed to start coming in to the office. It’s been a good move, productivity-wise, as I am able to focus on work much better when I am not in the same room with so much of my crafting equipment and materials.
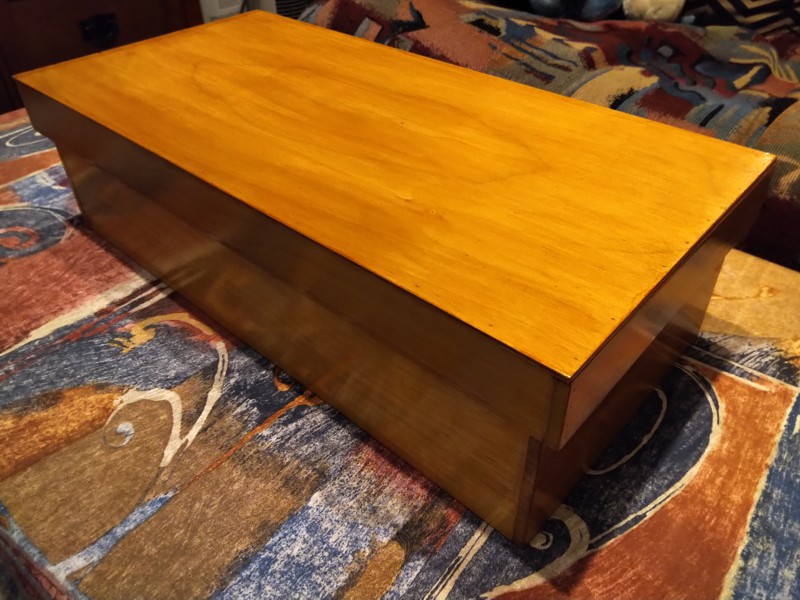
One thing I was really missing about my home office though, was the ability to work while standing. At home, I had started putting the cedar stepstool up on the craftsman endtable, and using that assembly as a standing desk for my work laptop. In the office, I’m using a desktop computer with a full keyboard, and the stepstool is not wide enough to accommodate that and a mouse.
Luckily, I still had some finished pine shelves from the old house in the garage. I cut one of them up into pieces, joined the pieces with dowels and glue, reinforced the joins with some metal right-angle brackets, finished the cut ends of the pieces, and now I have a standing desk for work without having to appeal to the furniture gatekeepers for an expensive motorized desk.
Choju squiga? A few weeks ago, there was a news story about a town in Japan that is attempting to kickstart tourism after the pandemic by installing a statue of a giant squid. Awesome, huh? I wanted to be able to use the image of the giant squid for my own purposes (porpoises?), so a quick trip to the paintbox later…
Giant Squid (01)
Giant Squid (02)
I’m happier with the tentacles on the second one, but I’m not completely happy with the shading on it.
Basically as soon as Sweetie and I had reached full immunity following our second COVID-19 inoculations (it’s not really a vaccine, you know), we went and visited my parents in NJ. They still live where I grew up in NJ, and although we did not want to go into NYC to visit fabric stores, I decided to search around the area to see what might have become available in the 30+ years since I left. Sure enough, the large presence of immigrants from Southeast Asia in my home town had resulted in some great fabric stores catering to their tastes, including one just 15 minutes from my parents’ house, called “Fabric Guy“. I was looking for some figured white silk for another project, but also wound up buying some of this lovely medium-weight silk brocade.
Close-up on the fabric
I suddenly decided that I needed a fancy kosode, because who doesn’t need a new fancy kosode every once in a while? One difficulty with the project is that the gold metallic threads for the flower buds (or whatever they are) are pretty much just behind those graphics. Cutting the fabric released hundreds of little whiskers, and I realized that wearing the kosode would break off more of those and they would get into everything else. The solution was to add a lining to the plan.
Open kosode, showing lining
I had some light-weight habotai silk in my stash, so I used that. I’ve madelinedgarmentsbefore, so this was not alien territory for me, but it has been a while. The trick, for those who don’t know it, is to leave closing the neckband for the very last step. That enables you to attach the sleeve linings to the body lining easily by pulling those seams to the outside of the garment. This silk was so light that keeping it still enough to sew was something of a challenge, but it came out OK, I think.
I want to get better at creating traditional-looking artwork from photographs. I had a couple of photos from our trip to Japan for the 2019 braiding conference, so I decided to try tracing them and making some Sesshu-inspired scroll blanks.
Duck Pond (01)
This first one is actually a composite of two photos. I had one photo of the ducks, and another of the distant shore of the pond. I combined these to create a little bit of perspective. I’m really happy with the way this one turned out. The ducks are attractive, and I was able to show the reflection of the shoreline in the water nicely.
Turtle Rock (01)
I’m somewhat less happy with this one. The turtle and the rock just are not very interesting, and the rocky shoreline at the top is just a bunch of gray blobs. Maybe with some color it could be nice, but maybe not. They can’t all be winners.
Bird Tree (01)
I tried doing this one as a gray wash only artwork, but the tree came out looking like a big gray blob on a stick, so I added a myriad of little daubs in four different colors of green. I kind of like it now. The bird is very visible.
I should note that I have expanded my “SCA Emaki” page to include most of my more recent explorations of Yamato-e brushwork.
In Japanese, what Americans call “chopsticks” are called “hashi“. “Maki” is the word for “roll”. Many years ago, I bought a pair of hashi that came rolled in a piece of fabric, secured with a cord and a bead, and this was such a handy thing to have that I realized these would make great gifts, and would be a good way to use up small squares of surplus fabric. I bought a couple packages of bamboo chopsticks at the Asian grocery, and away I went.
8 Hashi-maki, 2021 edition
Here are the products of that idea. The fabric came from my stash of surplus fabric. You may recognize some fabric from previous sewing projects. The beads came out of my stash of beads and baubles that have been given to me as tokens of appreciation over the years. The basic process is to sew two squares of fabric right-sides together, leaving one corner un-sewn, Turn the squares right-side out, and insert the ends of the cords in the unfinished corner. Top stitch all the way around, sealing the corner and securing the cord.
To use, place flat on a surface with the corded corner pointing to the right. Place a pair of hashi just to the left of the center line, oriented vertically. Fold the top and bottom corners over the ends of the hashi, so they can’t slide out of the roll. Fold the left corner over the hashi to the right. Roll the hashi up in the fabric, wrap the roll with the cord, and tuck the bead under the wrapped cords to secure the roll.
I did these two paintings more than a year ago (possibly two), but never even scanned them in, much less posted about them. They are more explorations of the artwork of Sesshu, the late-period painter who blended Chinese and Japanese art styles in sweeping landscape paintings. They are both copies of a panel in “The Autumn and Winter Landscapes”, a pair of hanging scrolls from late in Sesshu’s working life.
This first copy, as usual is an attempt to be faithful to the mostly monochrome style. I may have used a gray paint for the shading instead of a dilute ink, because it is way more predictable. I also left out most of the background of the original image, in an attempt to leave space for scroll wording. This image is nearly the full height and width of the paper!
This second painting is an attempt to add a little more color, mostly muted. I put much of the background back in, leaving out the sailboat on the water, but re-adding the hill (island?) beyond and its village. I think the leaves on the pine trees came out terrific, and the stippling for the fields is very good. I’m very happy with the way the dry-brushing for the rocky hillside worked out.