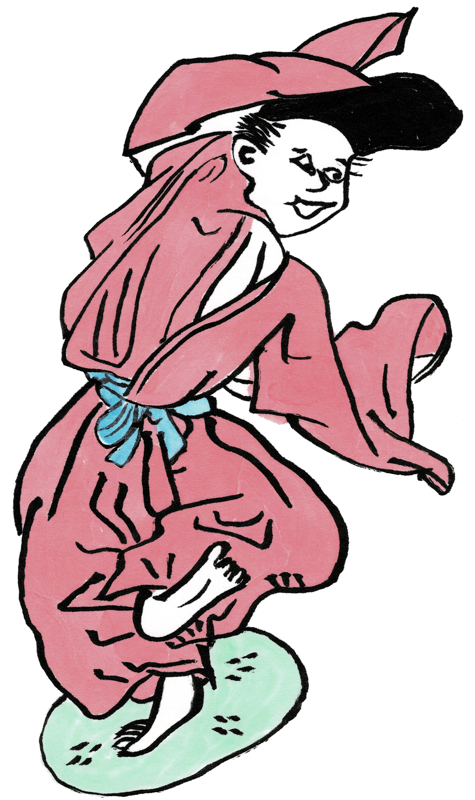
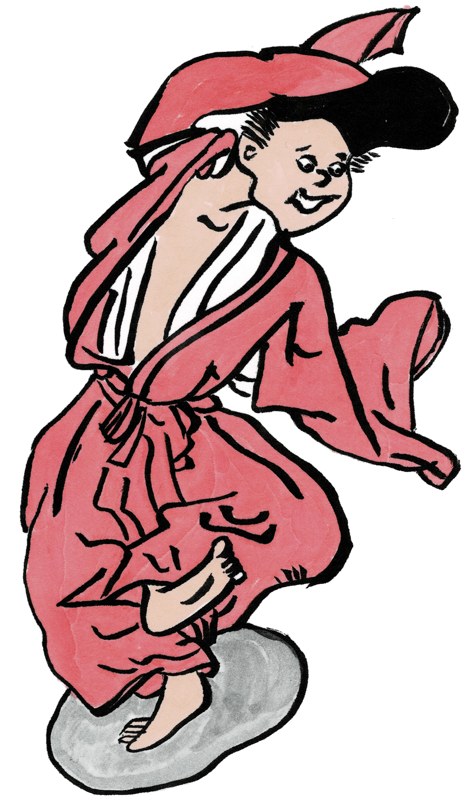
When I started tracing emaki images for scroll blanks, the very first one I did was from the Eshi Zoshi emaki. This emaki recounts the rise and fall of a young poet appointed to the court. I decided to do some “back to the well” blanks as part of my current work, just to see if I’d gotten any better over time.
The outlines are good, but clearly, I had forgotten everything I ever learned about coloring this image. This one went straight into the “scrap” folder as soon as the paint was dry.
Now I’m back in the swing of things! Good inking, good coloring, and I even added some light shading to give it a bit more dimensionality and texture. I’m pretty happy with this one.
When I was in the fabric store to buy the flannel for the new pajamas, I took a browse through the selection of “Asian”-themed cotton prints, and found this colorful “koi in water” fabric. I don’t really need another kosode, but I need to make something out of this.
Cotton Koi Kosode
Here are some details that will mean nothing unless you are a kosode geek: The fabric was a little narrow, but I can still get away with wearing 14-inch wide panels, and I had gotten enough fabric to make it knee-length like I like them now. The sleeves are almost fully attached to the body, but I still like to give them a little flappy bit at the bottom. The sleeves themselves are about 18-inches tall, and the opening is half of that. It has a 3-layer neckband that is only about 2 inches wide.
Here is a close up of the fabric so that you might appreciate how pretty it is:
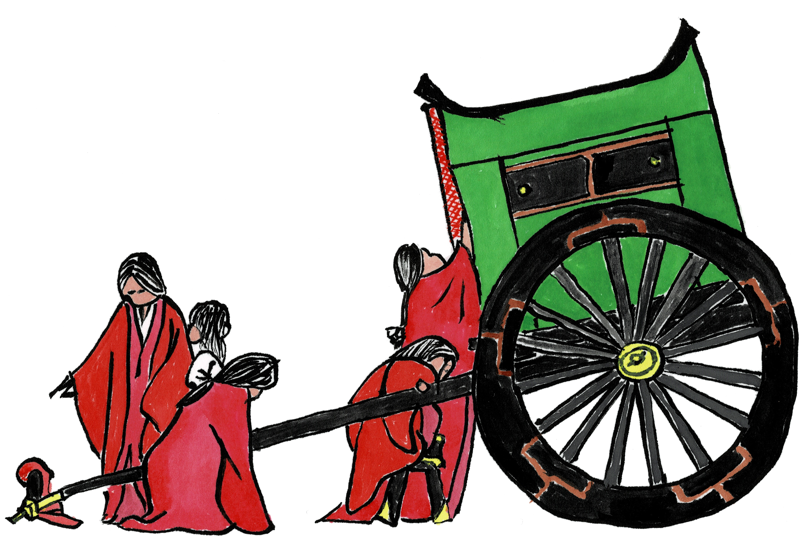
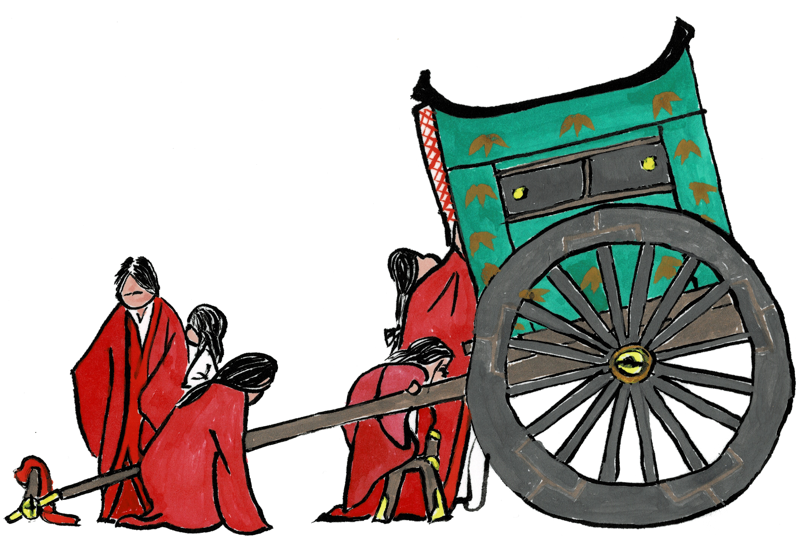
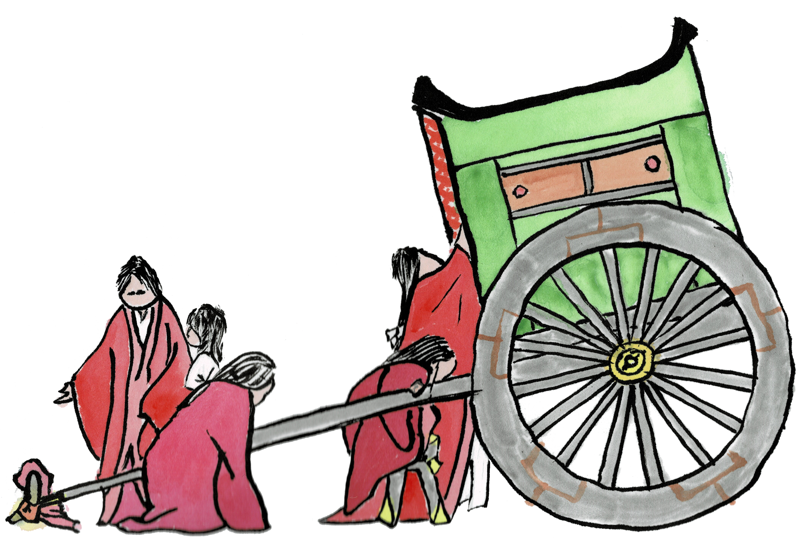
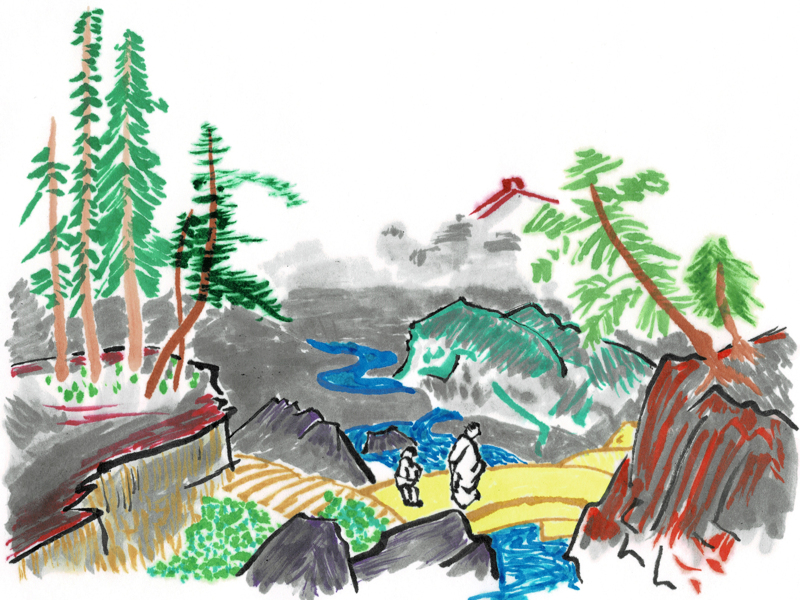
These three scroll blanks are traced from a frame captured from “The Tale of Princess Kaguya” a 2013 animated film Studio Ghibli. This film is beautiful, and has a large number of beautiful images in it.
This modern animated film is based on an anonymous 10th-century folk tale called “Tale of the Bamboo Cutter”. It follows the life of a mysterious baby girl who is found in a shining bamboo stump and raised to be a princess by a poor childless couple.
For almost a decade following its release, this was the most expensive Japanese film ever produced, possibly due to the art style that is based on the Yamato-e style of old Japanese illustrated scrolls (emaki). In 1999, director Takahata published a book called “From a Painting” in which he explored traditional Japanese art and its ties to his animation.
In this image, the devoted maidservants of the Princess ready her cart for travel.
This one’s a bit lighter, but still too heavy. I tried a different green on the cart, and embellished it with bamboo leaves the way it is in the film, though.
This one is so much lighter, and you can really see the different hues on the robes. I’m starting to get the hang of using really watery mixes of paint to wash color into the paper. The paper is super-absorbent, so you need a light touch to keep from creating blobs of color. Super happy with this one.
After 16 (!) years, my hydrangea-print flannel pajamas (the first pajamas I ever made) are well on their way to being entirely worn out, so I decided to get around to doing some more sewing and make myself some new flannel pajamas.
Pajamas from blue shibori-print flannel
These use a great shibori-print “Snuggle” brand flannel from the fabric store and (again) my favorite sewing pattern of all time. Again, though, I left the pockets and false fly out of the pants. I did wind up cutting the fabric too short for the pants legs, so I added the same style cuff to the legs that the pattern has for the sleeves.
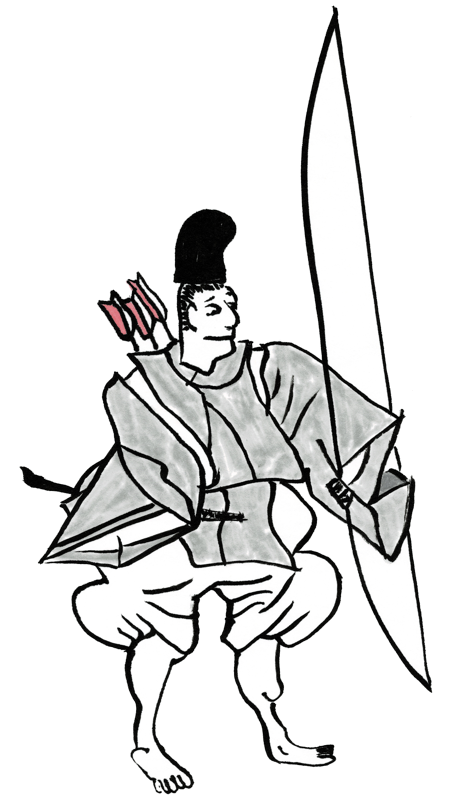
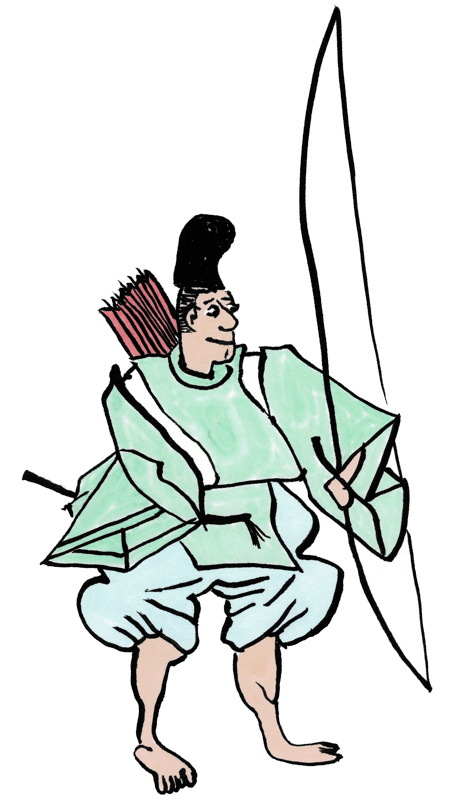
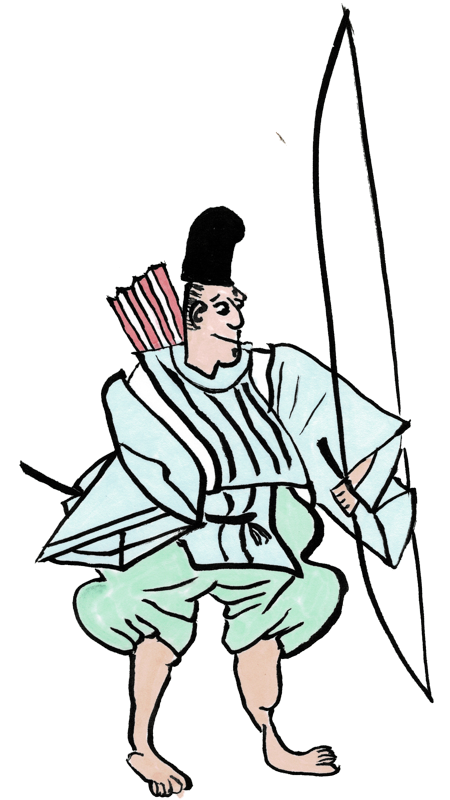
Sometimes, you just have to go back to basics and see if you’ve actually improved or just think so. I pulled this figure detail from the Heiji Monogatari, which details a series of civil wars in ancient Japan between the Heike and Genji clans.
This one, I used light color washes on his clothing, and a bit of peach pink on his flesh. At some point, I flipped this image left-to-right in my library. His sword is on the wrong side.
One more with watercolor washes. Maybe I can actually learn how to do this? If the outline for the soldier looks a little crude, he is fairly small in the original scroll, and I only have a very bad black+white image in my reference. These images will make good scroll for minor archery recognition, I hope.
I understand that your timetable says that your stores should start preparing for Spring and Summer, but really most of us still have needs for winter.
Ever decide in February that your old winter coat really isn’t cutting it? Good luck finding any winter coats in stores!
Ever run out of ice melter in February and you know there are three more storms before thaw? Good luck finding any in stores! Ever have your snow shovel break in February?
Just come on. Stores like hardware stores used to be about selling you relevant supplies you need today, not luxuries like patio furniture you won’t be able to use for three more months.
This emaki (illustrated scroll) presents portraits of the members of the Imperial Guard Cavalry, and is representative of the highly realistic “documentary” style of emaki that flourished in the Kamakura period.
It is interesting because although this emaki is from the time period when the black-and-white hakubyou style was the dominant expression of Yamato-e, it has light washes of color on the clothing of the rider and the tack of the horse.
I have exaggerated the coloring on this copy, but left the horse pure white.
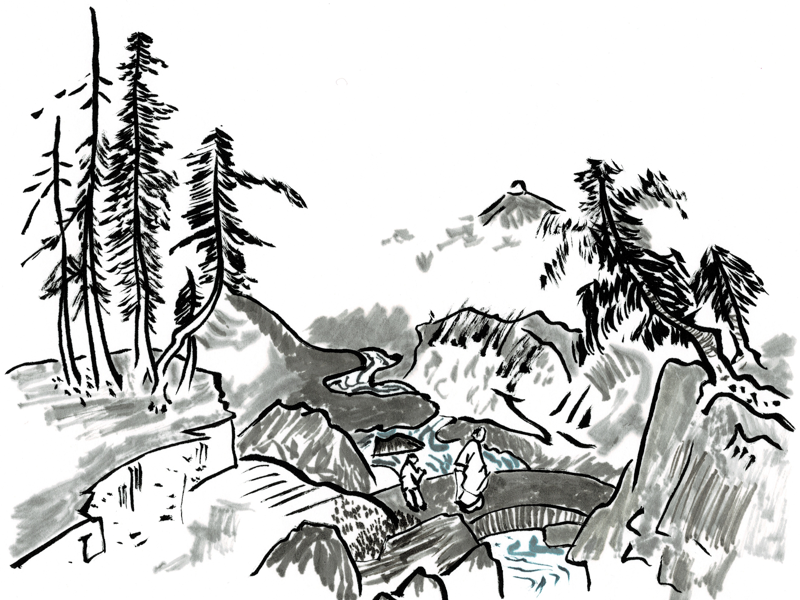
Next, I decided to copy another image from Sesshu‘s “Long Scroll of Landscapes”. Sesshu is one of my favorites, and I bought book about the Long Scroll when I visited the Tokyo National Museum during my first trip to Japan (for the TV show) in 2016. They have an excellent bookstore in the TNM, but I knew that I didn’t have a lot of room for books flying back, so I just bought this one. Anyway, the copies:
This first one is done primary with black ink lines, then some shading in paint (mostly gray) to simulate the light ink washes that Sesshu was great at and I am not.
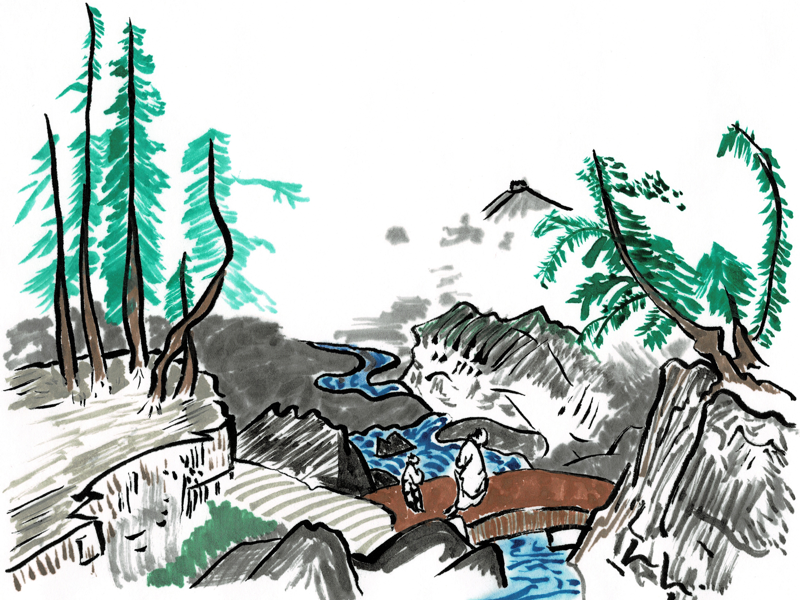
For this one, I added a little bit of color, mostly from my smaller set of sumi watercolors. I’ve done this kind of thing before, and I really like the effect this produces. It’s less traditional than the pure ink style that Sesshu used, but I like it anyway.
For this last one, I used entirely paint and no ink. Even the black lines a re black paint instead of ink. I was trying out some of the color variations in my larger set of sumi watercolors, some of which I had never used before. The overall effect is a little impressionistic, but I like the way some of the background washes came out.
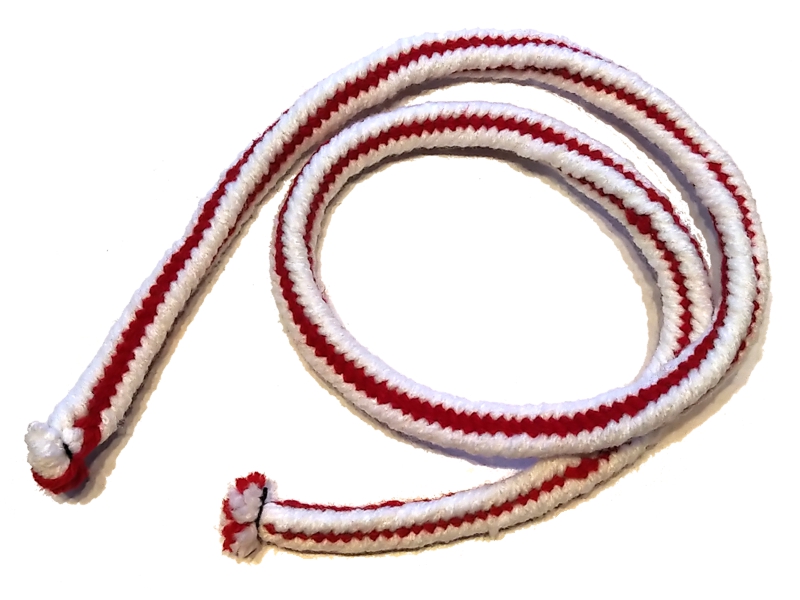
Back in the Spring, I started teaching myself a new kumihimo braiding pattern. It’s called the “Sankaku-kumi 1” braid. It is #116 in Makiko Tada’s Comprehensive Treatise on Braids: Marudai. It is a triangular braid with fifteen strands.
Most marudaibraids have a number of strands that is divisible by four. Eight, sixteen, and 24-strand braids are the most common. Odd-stranded braids are uncommon. I’ve done a 9-strand braid and a 17-strand braid in the past, and I’d love to be able to run a workshop on odd braids. This one seemed like a good candidate.
First, I did the braid in some acrylic yarn I keep around for learning purposes.
First try at the sankaku braid
It’s a pretty thick braid because I used two plies of yarn on each tama. You can see that there are a number of errors in this braid. Most of them seem to be of the “doing the wrong step at the wrong time” kind. There are 9 white strands, and 6 red strands. They are separated into six positions around the marudai: RR WWW RR WWW RR WWW. Each iteration, you move one white strands from each group two positions clockwise, and one red strand from each group one position counter-clockwise.
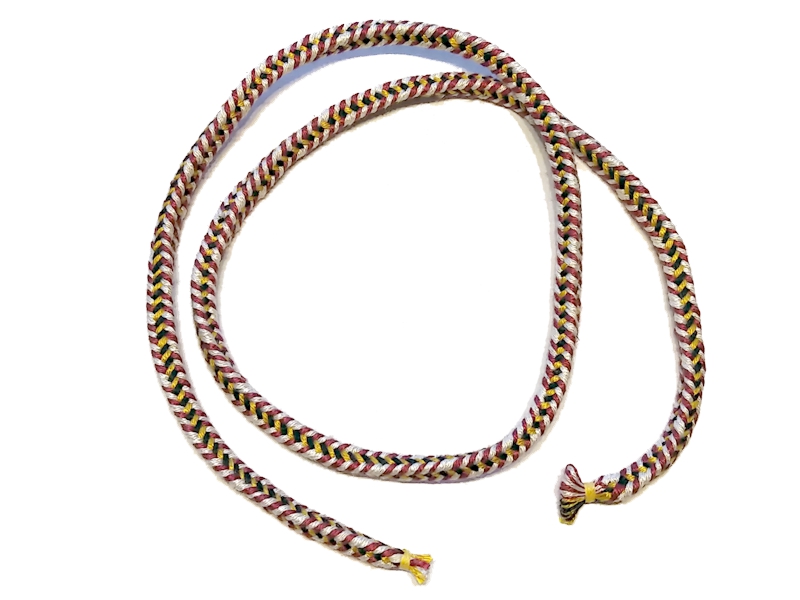
Second try at the sankaku braid
For the second try, I used cotton crochet thread, and reversed the colors. I don’t think there are any visible errors in this braid. There are some structural twists in it, though, that keep it from being smooth.
Third try at the sankaku braid
For the third try, I went with lace-weight silk yarn. I got started on this, then it sat on the marudai for at least six months. I got side-tracked onto other things and it stared at me accusingly for all that time like a one-eyed daruma doll. For this try, I used back and gold threads for the 6 center strands, plus red and white threads for the 9 outer strands. I did not quite plan out the color pattern well enough, so you can see where two white strands come one after the other. There’s also a big error from when I got started on the braid again and did the wrong thing at the wrong time. I’ve hidden it in the photo, though.
Anyway, this is a nice, fast braid when you don’t take a six month break in the middle of it. I’ll probably give it a rest for a bit, then do a fourth try to lock the pattern into my memory. Once I do that I can create my own instruction sheet and I’ll be ready to teach a class on it.