bookmark_border14th-century Japanese Toolchest Mark 3

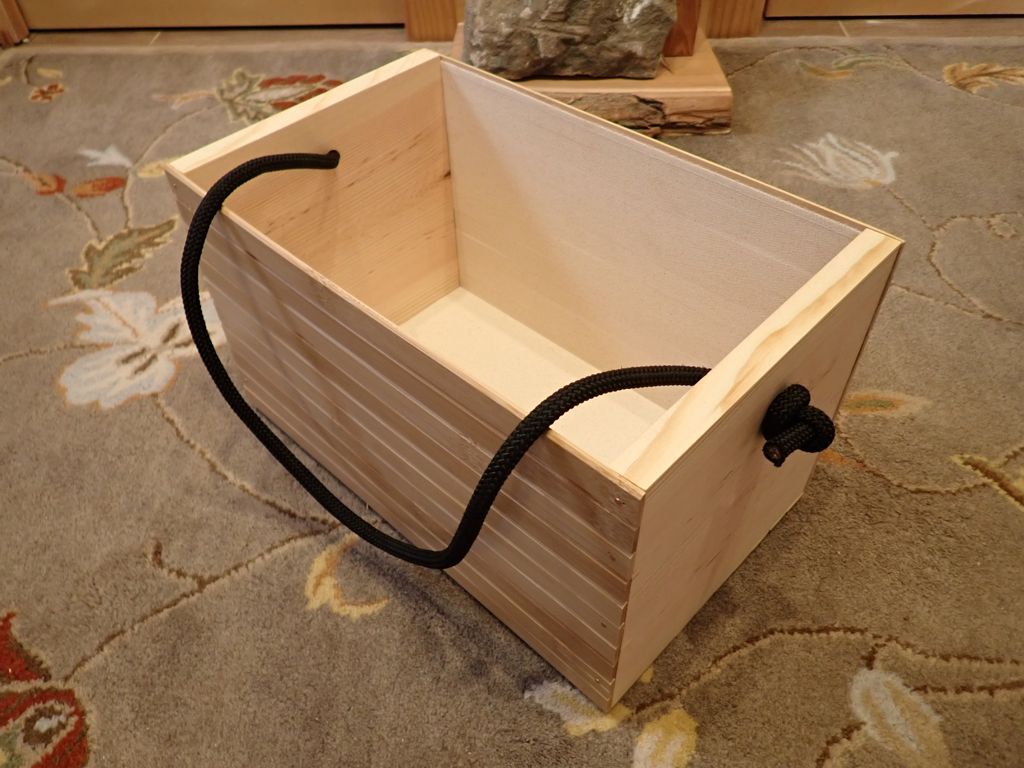
I have been putting off the next step in this long-running experimental archaeology project more because I wanted to work on it at a particular event than because of my normal level of procrastination. I planed down the 1by lumber months ago, then I cut and assembled the chest at Aethelmearc War Practice. I started this project working on the Mark Zero “proof of concept” chest at War Practice back in 2018 or 2019.

Anyway, this is the fourth try at making a tool chest that looks like one you can see in the Kasuga Gongen Engi-e. This emaki illustrated scroll is from the 14th century and shows scenes from the history of a Kasuga shrine, including the shrine’s construction.

To better match the size and look of the Kasuga chest, I started with 1×6 lumber instead of the 1×8 I used on the Mark 2. It’s only about 39 inches long instead of the fifty-something inches of the Mark 2. I also used the thicker battens like I discussed, which I think worked out well.

Here is what the four chests look like laid out in a row:

I think I really have the look now. The size an proportions may not be exactly right, but it’s pretty much there. I’ll maybe work on a few tweaks at some point in the future.

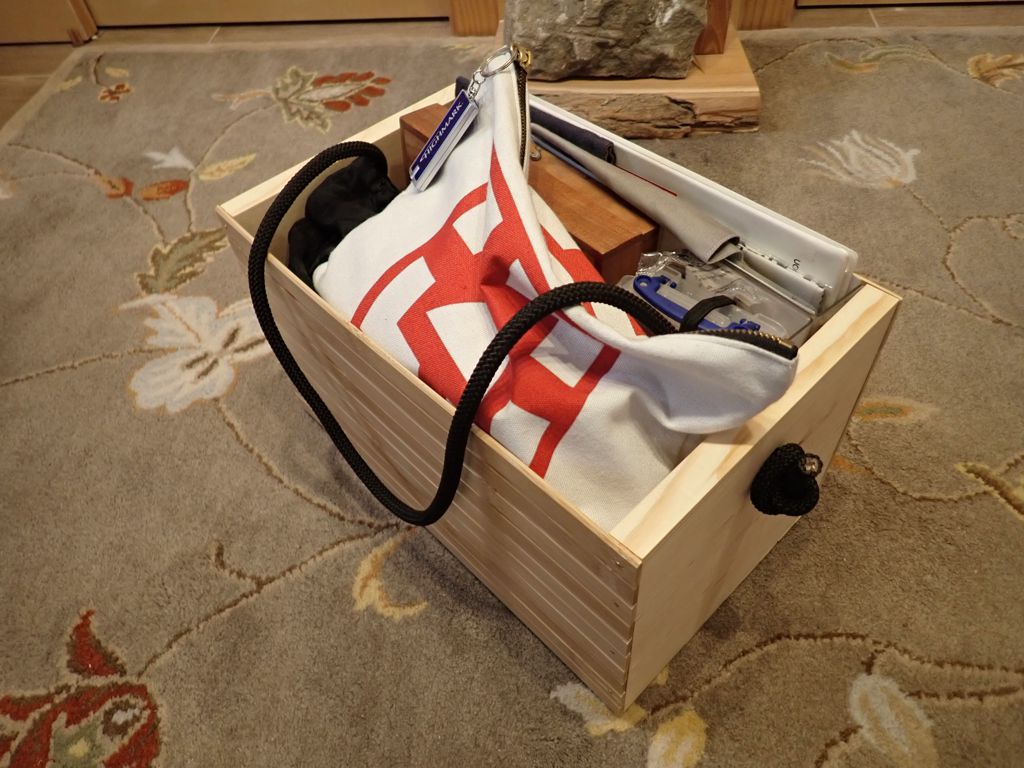
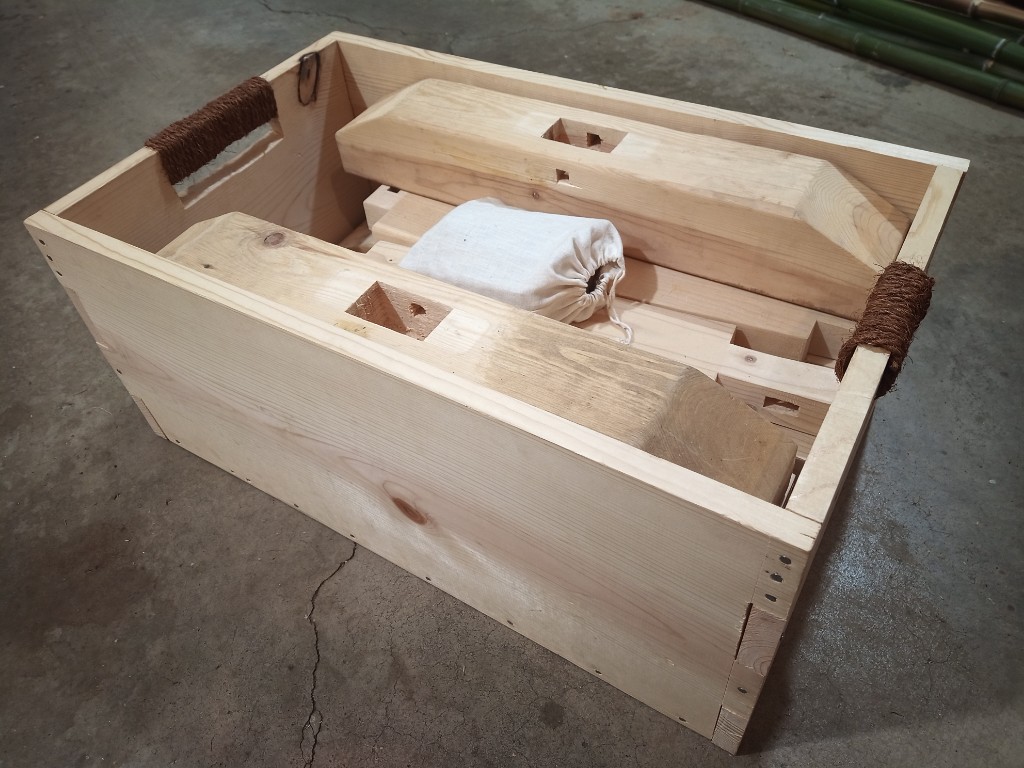
It’s long enough that I can get some of my longer saws in there, just deep enough that things don’t get buried under several layers, and still wide enough that some of my organizer tills fit in there sideways to keep things from sliding around.

bookmark_borderEndai Bench with Folding Legs

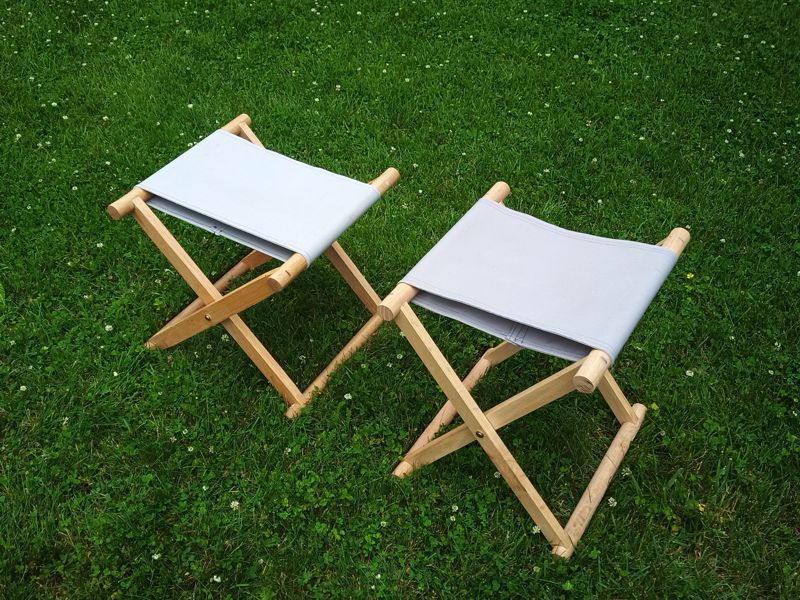
We are going to need some auxiliary seating at an SCA event in March, and most of the benches I have made are locked up in a storage trailer. Plus, they are large and not very portable. My breakdown bench is nice and portable, but somewhat of a pain to re-create given the weird joinery. I decided to design something based on the shape of a Japanese endai bench, but a little smaller than normal, and with folding legs so that it be a little more portable. Bonus points if I could make it so that it would fit in a little fold-up wagon we use to transport stuff at events.

The endai with folding legs

The top of this bench measures 15″x30″ and it is about 15″ tall. It took me most of a Saturday in the shop from start to finish. I was able to construct it entirely from lumber that I already had in the garage. The majority of the 2by4 material came from a single 12-footer that’s been up on the rack for three or four years. As a consequence, the bench has a bit of a twist to it and doesn’t sit completely flat on the floor until you put some weight on it. Even the axles for the legs are made from a poplar dowel I had “in stock”.

The endai with folded legs

Late in the design process, I decided to move the legs in one inch from the ends. I did not think about the fact that this would mean that the legs would have to be shorter if they were going to fold entirely into the undercarriage. So, it does not fold up entirely, but it does fold up mostly. If I cut the legs an inch shorter, they would fit, but I also would have to cut clearance curves onto the ends so that the corners wouldn’t jam things up.

I used screws to hold the whole thing together, which I’m not proud of, but I just was not in the mood to do fancier joinery than that. I am proud of the fact that I did most of the cutting by hand with a ryoba saw, though the curves at the tops of the legs were much easier on the band saw. The sanding and assembly were all done with power tools, because I really did want this to be done in one day. Success!

bookmark_borderNew Older Japanese Tool Chest

Most of the Japanese toolchests I make follow the pattern established by Toshio Odate, which makes them very traditional, but very modern.

From Page 10 of Odate’s
Japanese Woodworking Tools

So what were Japanese toolchests like in the medieval period? Similar in some ways, but a lot less sophisticated.

From the circa 1309 emaki
Kasuga Gongen Genki-e

In this fourteenth century illustrated scroll, two apprentices take a break from working on the construction site of a new temple. One leans against a tool chest that is open, showing some tools inside. We can estimate that this chest is about 3 feet long, about 1 foot wide, and six or seven inches deep. The end handles and clever locking mechanism are missing, but the cross battens keep the lid from falling in. The wood seems very thin, represented by a single line whereas the battens are shown with rectangular ends. No joinery or fasteners are visible, which makes them something of a mystery. Butt joinery is used on the modern chest, so we can assume it was used here, too. No edge to the bottom of the box is visible, so the bottom piece is most likely fully captive. Nails are used on the modern chest, so it’s likely they are used here, though they may be wooden nails or pegs.

Here is my interpretation of the fourteenth century toolchest:

My New Older Japanese Toolchest

I ran a 6-foot 1×8 and a 6-foot 1×12 through the planer to shave it down to a half-inch thick. I cut the bottom, lid, and two ends from the wide wood. I cut the sides and battens from the “narrow” wood, ripping the 7.25″ width into 2″ battens. Then, I nailed it all together.

My New Older Japanese Toolchest, Opened

I deadened the nails for the lid, so it should hold together pretty well. The whole thing is 29 inches long, which was about the biggest chest I could make from the two boards with which I started.

What did I learn? My chest isn’t long enough, and it’s possibly too deep. The proportions just don’t look right. My battens should be made from thicker wood, and should be both narrower and closer to the ends of the lid. Because I used thinner wood, this chest is a lot lighter than a previous attempt. Very little wood is wasted, unless you count the one third of the lumber that got turned into shavings.

bookmark_borderMonitor Riser

first project of he new year! Sharon’s been asking for this for a while, and I finally got around to it. It’s a desk riser to boos her monitor a few inches so she can see the monitor over the laptop screen and have a place to stow her flatbed scanner when she’s not using it.

Sharon’s Monitor Riser

So yes, this is more left-over shelf material from the old house. I spent so much time staining and finishing these shelves that I could not bear to throw them away when we moved six years ago, and I have been cannibalizing them as pre-finished materials for little projects ever since,

this riser is 21 inches of pine 1×10 shelf supported by some 3.25″ lengths of 1×10 to make the riser about 4 inches tall. The “legs” are joined to the top using furniture dowels (left over from IKEA purchases) and a couple of brass right angle brackets to make sure it does not wobble. I added some stain and water-based polyurethane to the cut edges to give the riser a completed look. I even did most of the cutting by hand because it was faster than setting up the table saw for four cuts.

Sharon needed 17.5 inches between the legs to stow the scanner without kinking the cord, so the 18 inches I gave her is more than enough. So much classier and more useful than a couple of phone books!

bookmark_borderKeyboard Booster for Work

I started a new job back in September, while the office was completely closed. I about reached the end of my work-from-home productivity rope this Spring, so I appealed to my boss to be allowed to start coming in to the office. It’s been a good move, productivity-wise, as I am able to focus on work much better when I am not in the same room with so much of my crafting equipment and materials.

One thing I was really missing about my home office though, was the ability to work while standing. At home, I had started putting the cedar stepstool up on the craftsman endtable, and using that assembly as a standing desk for my work laptop. In the office, I’m using a desktop computer with a full keyboard, and the stepstool is not wide enough to accommodate that and a mouse.

Luckily, I still had some finished pine shelves from the old house in the garage. I cut one of them up into pieces, joined the pieces with dowels and glue, reinforced the joins with some metal right-angle brackets, finished the cut ends of the pieces, and now I have a standing desk for work without having to appeal to the furniture gatekeepers for an expensive motorized desk.

Keyboard Booster at Work

If you are interested in my ginchy custom desktop backgrounds, see the “Liberty Exit” and “Tokyo Maple Shrine” images in my Desktops Gallery.

bookmark_borderShelf Table

Back at the old house, we had six shelves in the guest/sewing room. They were made from edge-glued pine panels, stained with a water-based “rosewood” stain, and finished with water-based polyurethane. Here at the new house, we only needed two of them, so the other four shelves were in storage waiting for a good project.

Two Shelves

A few months ago, the Sweetie asked if I could make a bedside table for the guest room here at the new house. The only real requirements were that it matched the room furniture, and had enough space underneath to fit this hamper that also lives in the room.

Shelf Table

I took three of the surplus shelves, cut them to length, joined them with dowels, and glued them together. Of course, that was pretty-rickety. so I added some diagonal braces that I cut from one of the offcut pieces of shelf.

Underside of Shelf Table, showing bracing

Not very fancy, but it saved us a trip to the furniture box, and we know it matches the shelves!

bookmark_borderLantern Storage Box

I’ve only made three of these lanterns so far, but I intend to make six, so eventually I will need something to transport and store them all in, or they are going to get pretty beat up. So, another box.

Lantern Box, Closed

This was also yet another exercise in using up surplus materials from other projects. I wound up having to use a piece of MDF for the lid, because that was the biggest piece of anything I had left. The edges are off-cut from 2-by-4 lumber from when I was making pole by cutting square pieces from 2-by-4. It awfully satisfying to use up some of that stuff.

Lantern Box, Open

You can see that the extra height of the lid makes it easy to get the lanterns in and out of the box. There’s an extra half inch in each direction, so the lanterns fit snugly but not tightly.

The whole thing is finished on the outside with spar polyurethane, especially the MDF on the lid, to give it a little more water resistance than a cardboard box. I glued some blocks of wood to the bottom to serve as feet, so it won’t be resting entirely in any puddles.

Basically, the whole thing is constructed with glue and nails form the nail gun. The bottom is thicker plywood to make it bottom-heavy, and the rim on the body both supports the lid and reinforces the corners of the box. This is a design and method I’ve used before with some success.

A lot of the sizing of pieces can be done while you’re building. For instance, I make the body of the box, then I measure the outside of the top before cutting the pieces for the lid. That way the lid is sized to fit the actual box, and not just my best hope.

The whole thing is kind of rough, because it’s not supposed to be anything special. You can see in the photos that I didn’t even sand off the mill markings.

bookmark_borderMid-Height Japanese Sawhorses

Some years ago, I made a pair of low Japanese sawhorses for my workshop. They’ve been great, and very useful (mostly for keeping lumber off the floor in the garage), but it was time to take the next step up. My rickety western sawhorses spend most of their time sitting outside in the rain and snow, so they are not in very good shape. A set of mid-height Japanese sawhorses would be nice to have, because they are designed to break down into pieces for transport and storage.

Sawhorses Four

These sawhorses are about 24 inches tall, 24 inches long, and 22 inches wide at the feet. This height is just short enough that I can put my knee on a board to hold it while sawing, but tall enough that I don’t need to worry about scraping my saw along the ground. All the joinery is mortise and tenon, and there is no metal hardware in anything.

They are made almost entirely from pine. Given their modest stature, I could cut all four horses from three 4×4’s, two 2×6’s, and one 2×4. This means that there is only about forty dollars of material in the whole set. The pegs that secure the feet to the legs and the wedges that secure the legs to the stretchers are made from some surplus walnut I had in the shop. It’s always best to make the fasteners from wood that’s harder than the wood it is securing, but maybe walnut was an extravagant choice.

I wanted to make these from cedar instead of pine, but it turns out that these days cedar is five times as expensive as pine. It used to be only twice as expensive as pine. My next big woodworking project is going to cost me $500 instead of $100 for the lumber alone. Gasp.

I cut all the pieces to length by hand, but I used the mortising machine to cut nearly all of the mortises, and the band saw to cut nearly all of the tenons. I smoothed the walnut fasteners with a hand plane, though. After completing all of the shaping and joining, it took me about three hours with the orbital sander to clean everything up and remove most of the saw marks.

When taken apart, I can fit all the pieces for three horses into a single large (27 gallon) storage tote. This means that in the winter I can put the horses away in the garden shed instead of having them sit outside like the old ones.

Four Sawhorses

bookmark_borderTachi Kake

The tachi is a type of Japanese sword that is similar to a katana, but it is worn differently, has different fittings, and is usually used as a more of a formal/ceremonial sword compared to a warrior’s katana. I bought a small tachi as part of my mission to recreate a full bunkan sokutai.

When not in being worn or in storage, the tachi would have been displayed nearby the bearer in a vertical stand called a tachi kake. These are readily available to buy, both as new items and antiques, but of course I wanted to make one myself. I was able to settle on a design, and I still have an excess of surplus wood in the garage.

Tachi Kake Before Finishing

Here’s what it looks like after cutting and shaping, but before finishing. It’s a little easier to see the shapes of the pieces. This is all pine lumber. The upright and the bracket at the top are just 3/4″ thick cut from 1by. The brace at the bottom of the upright is 1/2″ thick pine I had around; most of the examples I see online are only 1/4″ thick. The base is cut from some surplus 2by, to keep it bottom-heavy when unoccupied. The brace is fitted in a slot that I cut all the way through the upright. Tenons at either end of the upright fit into through-mortises for ease of assembly and disassembly.

All told, this item is about 26 inches tall when fully assembled. The tapering curve on the upright piece is one of my favorite shapes ever. I did almost all of the cutting on the band saw, though, because it made things like this curve so much faster to make. I also used a router to bevel and round over all the edges on all the pieces to give it a softer look.

Tachi Kake After Finishing

Here it is after about a half-dozen coats of black-tinted polyurethane. This stuff makes a good affordable lacquer substitute, and it dries in hours instead of weeks. I sanded the finish between every couple coats, but it still needs some final polishing. I also want to add some embellishment like I did for the kyousoku arm rest, but that might not happen until autumn.

For a better sense of scale, here’s another picture of the tachi kake before finishing, with my ko-tachi in the stand like it is supposed to be:

Unfinished Tachi Kake with sheathed Tachi

bookmark_borderPrototype Scribal Box

When I was getting the Debatable Lands Woodworking Guild started, I polled the people who were attending planning meetings to see what projects we could work on as a group to produce things for the Barony. One of the ideas was to produce “portable desk” type scribal boxes that the Baron and Baroness could gift to scribes. It’s taken me some time to get around to it, but I was finally able to plan out what such a thing might look like, and use up some surplus wood from the garage to make a prototype.

Closed Scribal Box

This simple, hinged-lid box is made entirely from pine, and finished with amber shellac. The walls of the box are half-inch thick, and the larger surfaces are 3/8″ thick. both thicknesses are the result of planing down some 3/4″ lumber to remove severe cupping warpage. The top and bottom were made from some 1×12 shelving, so I was able to make the full width of the box from a single piece without resorting to plywood.

The work surface is 11 inches wide and about 12.75″ tall, a fine size to accommodate 8.5″x11″ or 9″x12″ paper with some room to spare. A slight slope should make work a little easier on the wrists.

I have no historical examples for this kind of box, I am merely imitating other scribal boxes I have seen in use around the SCA.

Open Scribal Box

The interior of the box is about 10 inches by 14 inches, able to hold supplies slightly larger than average to a depth of about 1 inch at the front and 3 inches at the back. It’s slightly less than that because I decided to add the two battens underneath the lid to support the thin wood during use and keep it from warping.

The box is assembled using modern wood glue and wire nails, and finished with three coats of amber shellac. I’m not sure why my shellac came out so streaky this time. It could be that the shellac needs more alcohol in the mix, or that it was very hot in the shop yesterday causing the finish to dry more quickly than it could even out.

Because I had suitable material on hand, shaping and assembly of the box took less than a day. I did some hand sawing, but a lot of the sawing was done on the band saw. Assembly was entirely by hand, even to the level of hammering in the nails by hand to avoid blowing out the thin wood sides with the nail gun.